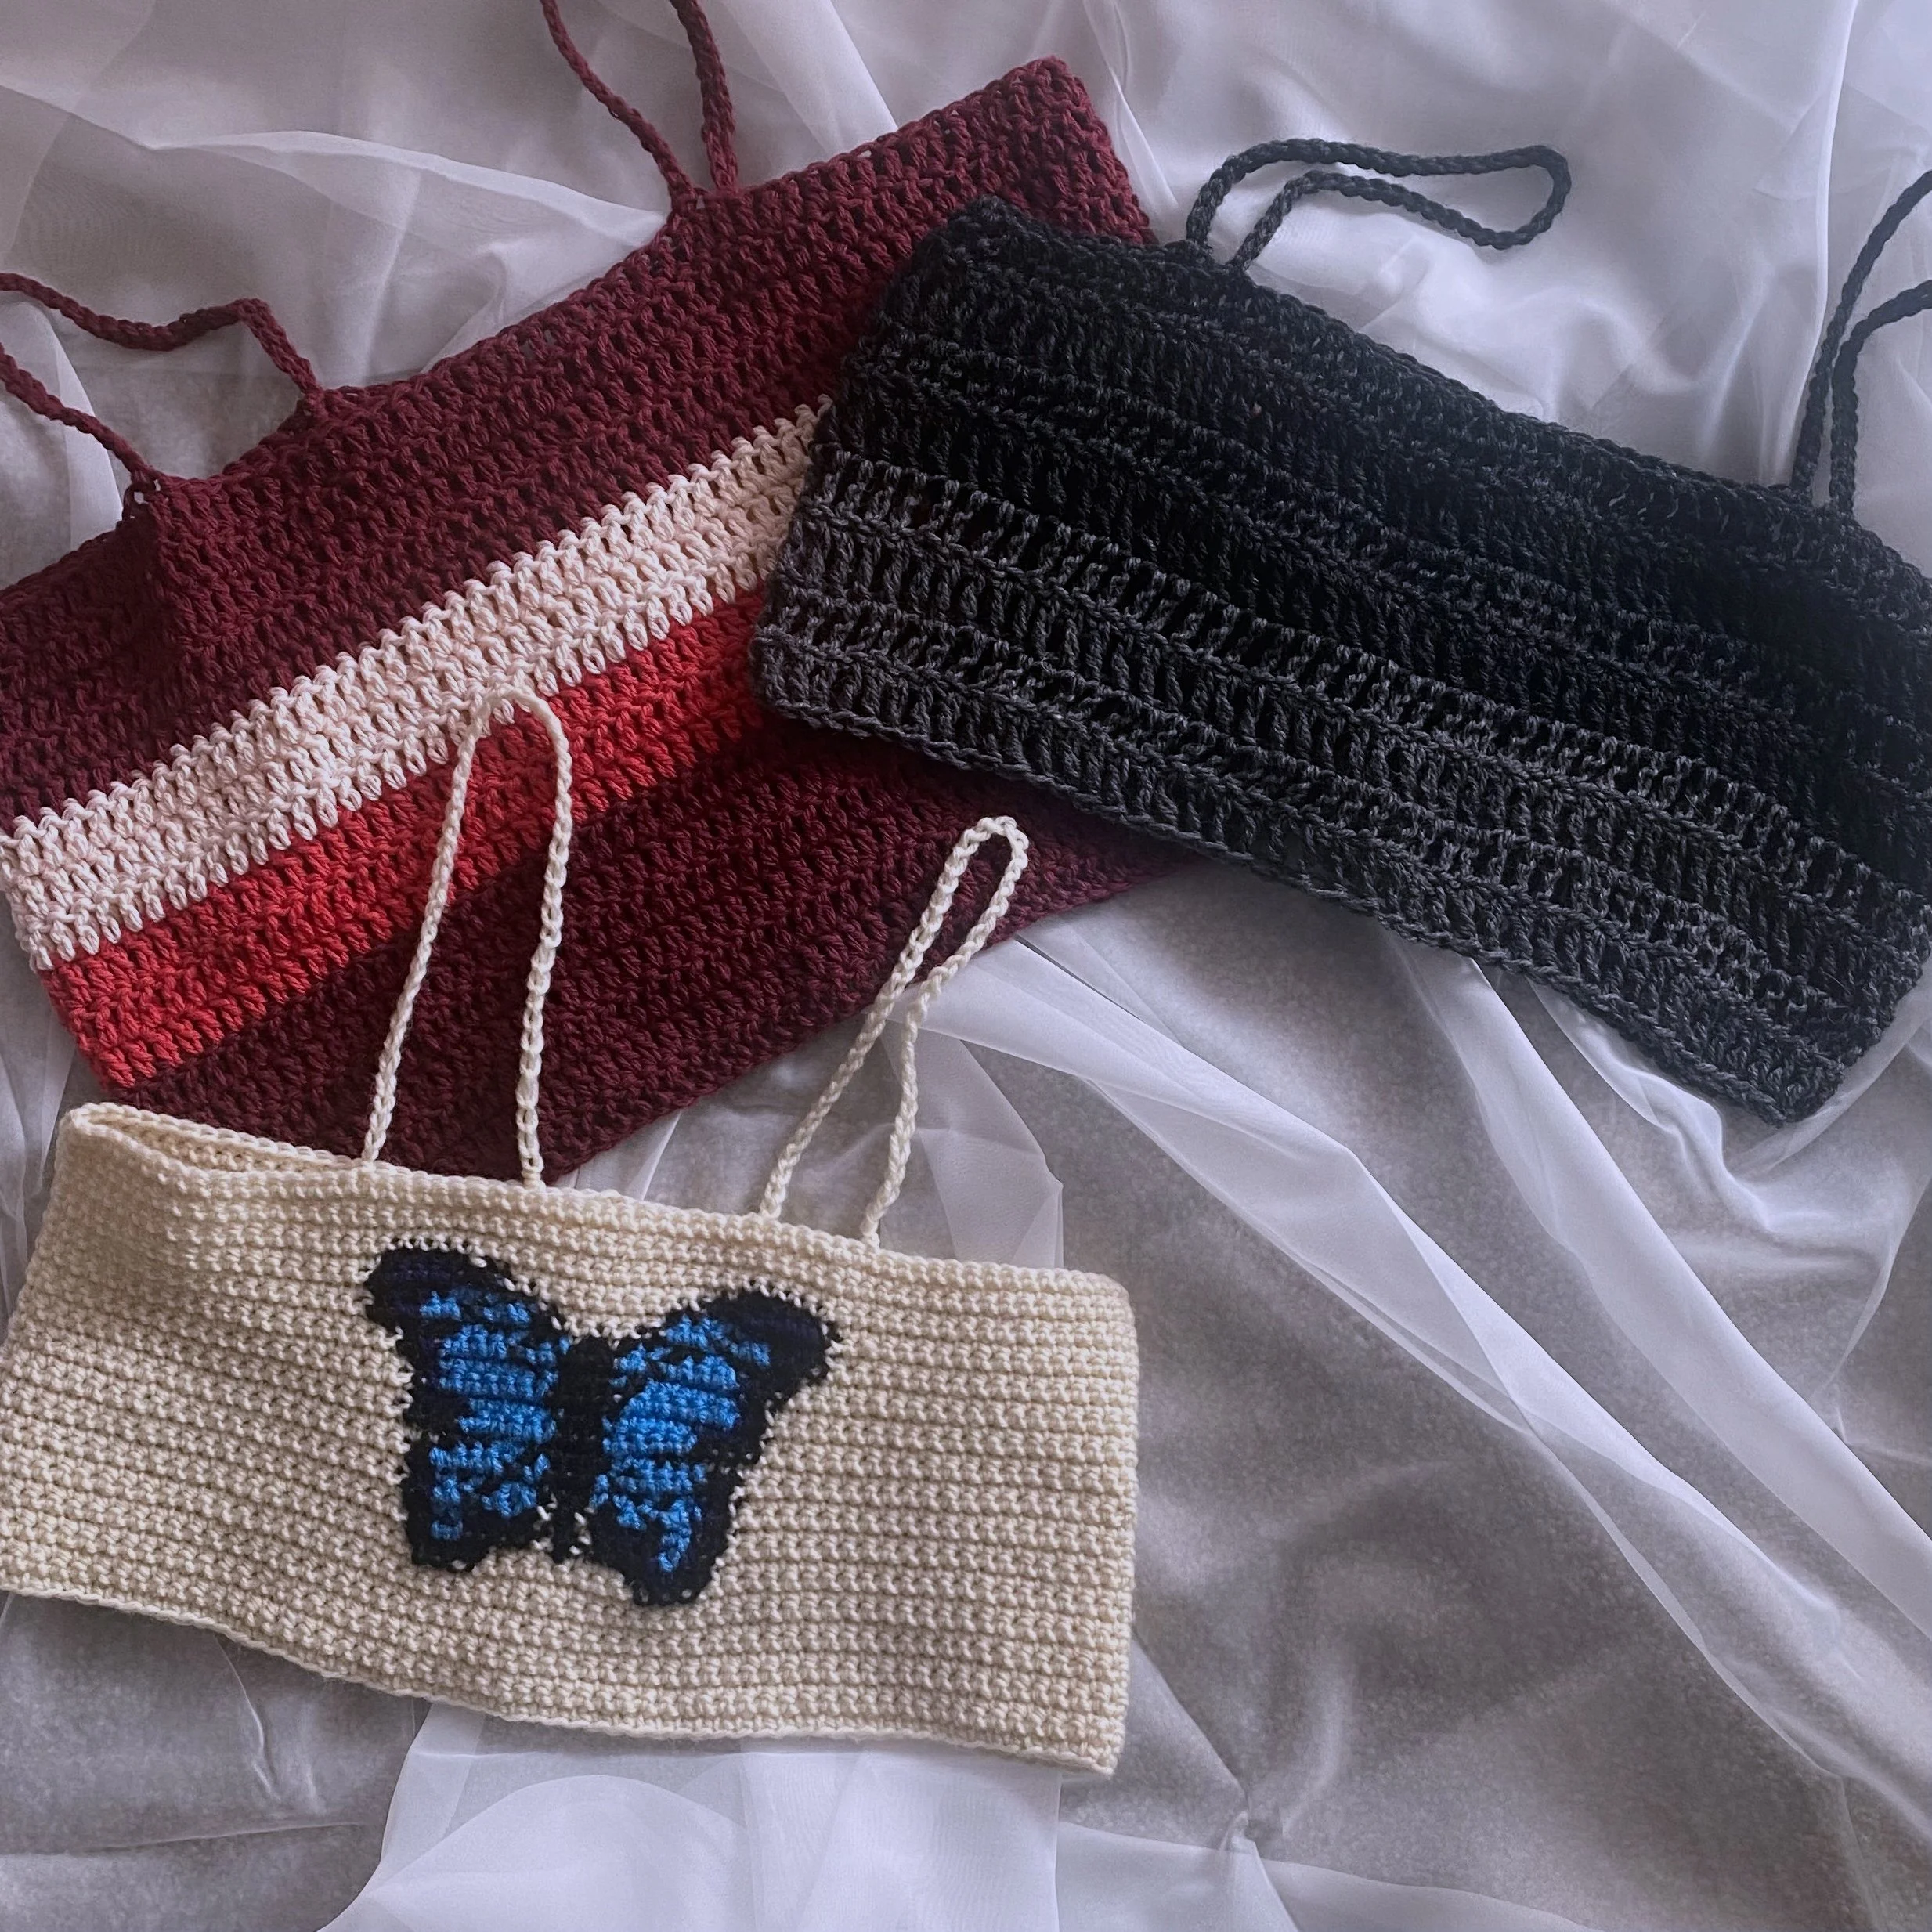
y2k butterfly tank top ♡
this was my very first colorwork project, from January 2021 ♡
you can download this pattern as an ad-free PDF: https://www.autumnolive.com/shop-patterns/p/y2k-butterfly-top
written in standard US crochet terms
you may sell items made using this pattern! please credit me as the designer in your listings and include the link to this pattern.
@autumnolivecrochet on all socials, tag me when you post your creations!
youtube tutorial: https://youtu.be/-jnXBL1u4k0
materials ♡
-size 5mm crochet hook (used in example)
-worsted weight 4ply yarn (wool used in example, worked in single crochet)
-yarn needle, scissors, measuring tape
made to measure so feel free to experiment with different yarn/hook size
info ♡
y2k tank top is worked in rows with chain spaghetti straps
example is 26 rows of 108 single crochet stitches
you can easily adjust the length of the top or width of the straps
use any yarn or hook for this top to achieve different effects
colorwork tips ♡
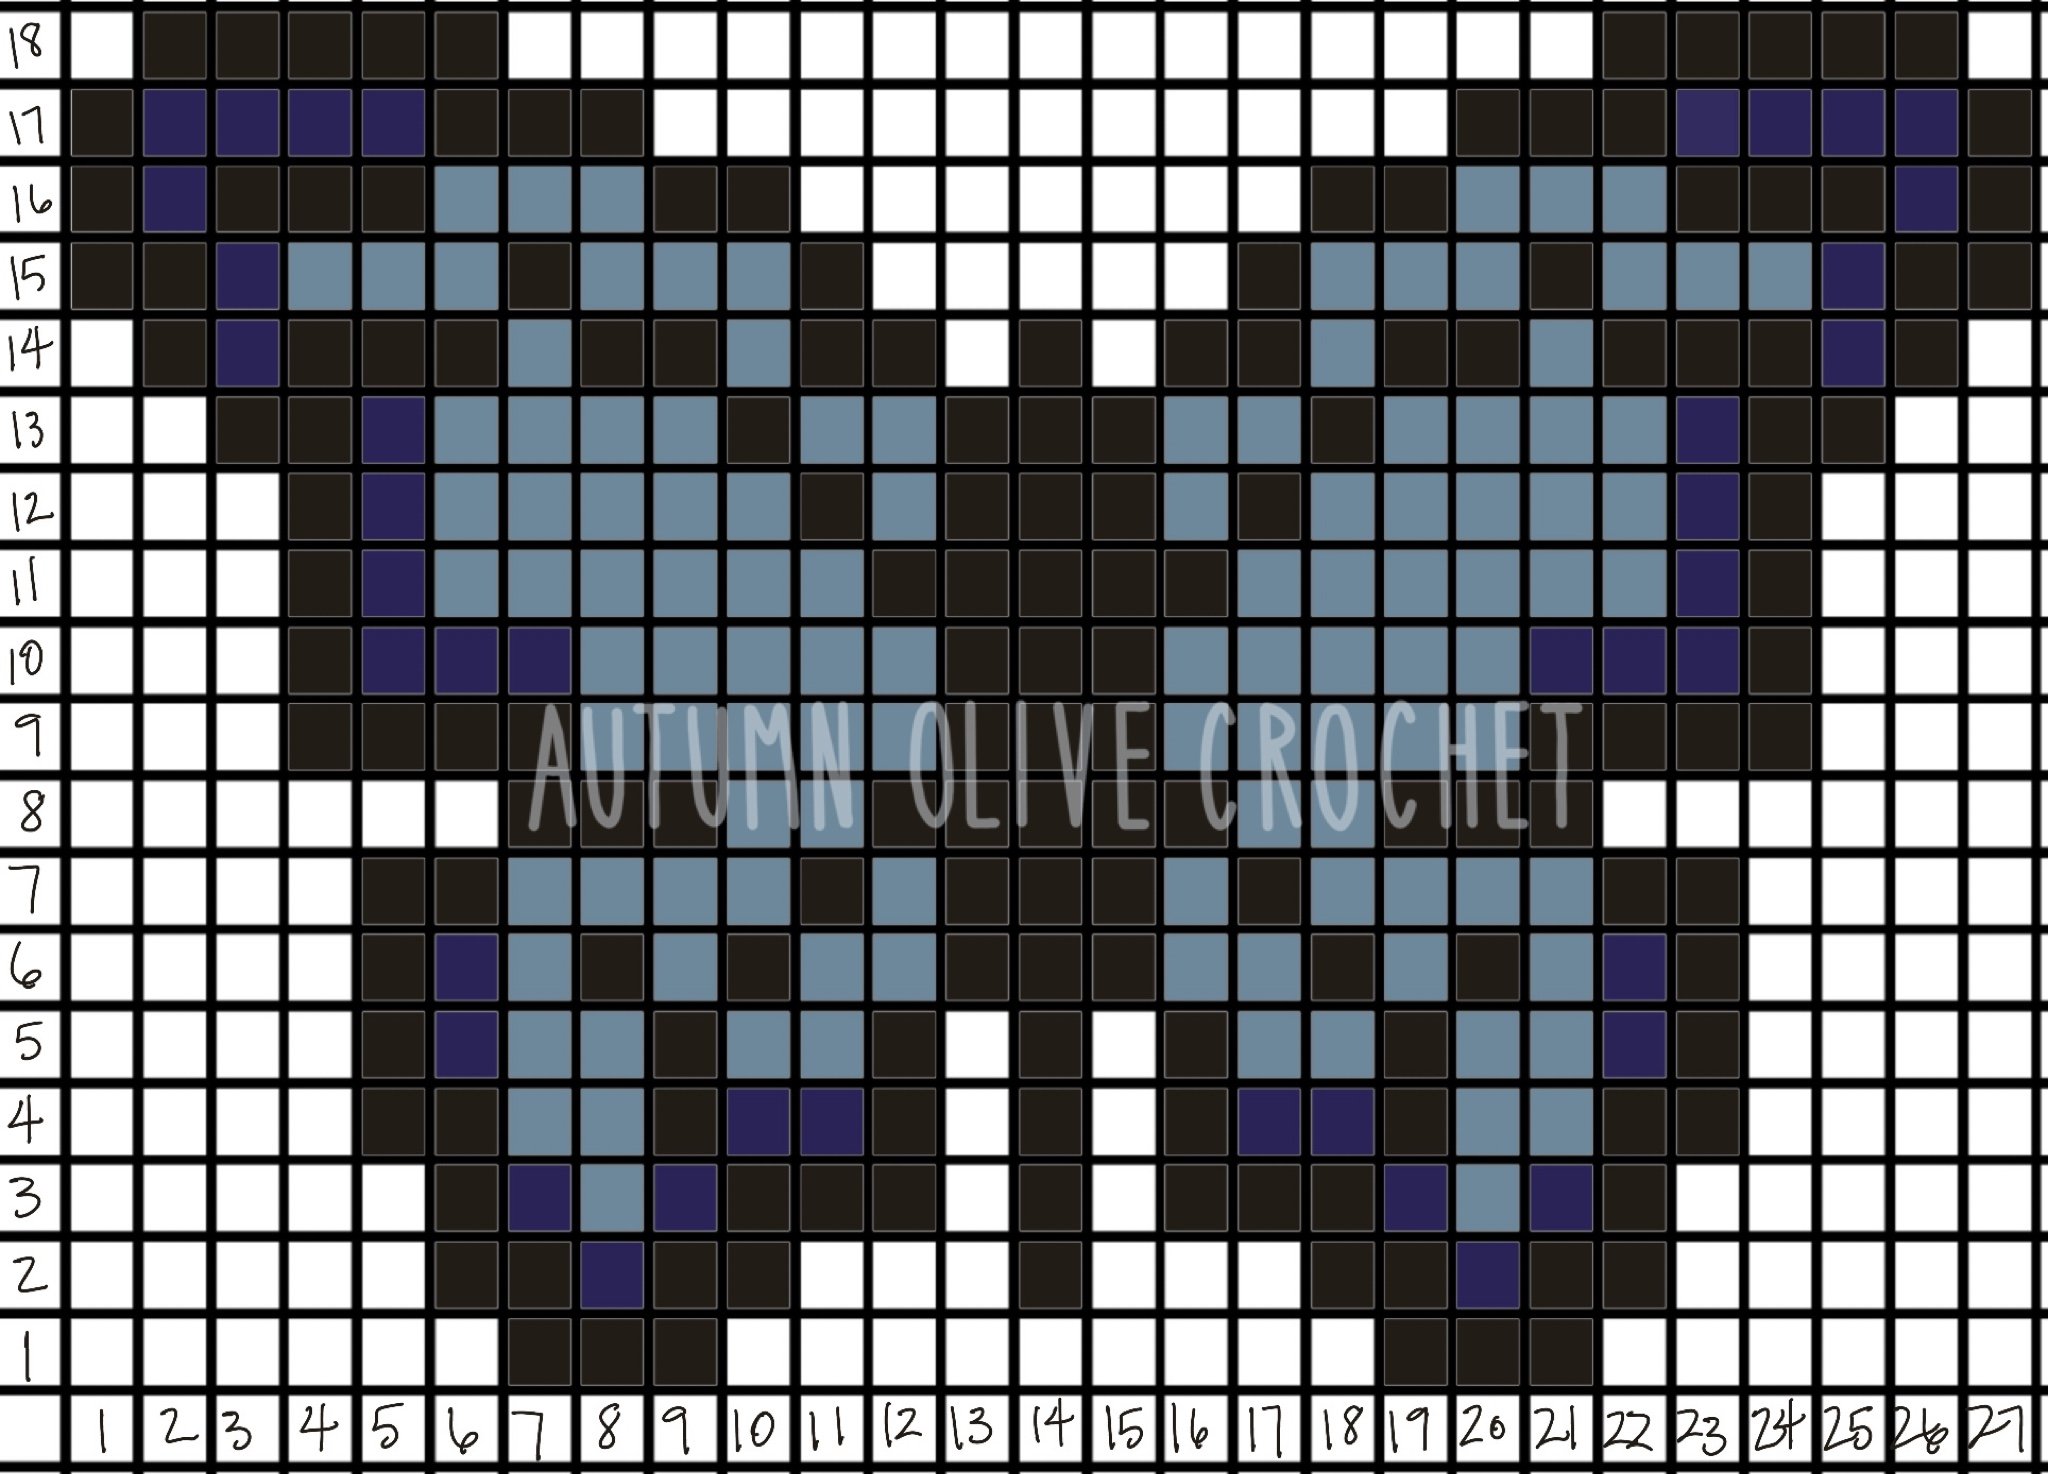
add in a graph from google or any of my patterns as long as it fits in the dimensions of rows vs stitches that you’ll have
when changing colors it should be done on the last stitch of the current color: (for single crochet) insert hook, yarn over, pull up a loop, yarn over with the new color then pull through.
just simply crochet over the ends to carry them to the next stitch of that color.
keep all ends to one side of the piece.
make sure to untwist your multiple colors with every row or two to prevent tangling!
use this graph for single crochet
♡ THE PATTERN ♡
step 1: measure around the largest part of the chest/torso or simply chain the length of the circumference you want, you will be working in rows for the height of the top
I preferred a loose fit so I didn’t remove anything from the meaurement, but depending on your material, you may have an inch or two of stretch you might take into account if you want a more fitted garment
step 2: making the height of the top
you can work this piece in single, half double, double, or triple crochet! graphics will work best on single or half double crochet, example is single crochet
for a double crochet, chain 2 at the end of each row and for a triple crochet, chain 3
after you’ve made your chain and decided on your stitch type, stip stitch to the first chain
row 1: chain 1 (or 2 or 3) (counts as your first stitch of the row), turn, crochet across, slip stitch into the top of the chain stitch
row 2: repeat row 1 up through the height you need
fasten off your final row
step 3: making the straps
determine the center of your top if you had not already; then mark it if needed and be sure to set the straps equidistant from the center
place a stitch marker on the front of the top at each point where you want the straps to be attached, then do the same on the back of the top; try to measure how long you will need the straps to be (remember it will stretch while worn)
make a slip knot with an 10” tail, pull it up at one of the back stitch markers, make a chain of the needed length and slip stitch to the loop on the front with the stitch marker; for a stronger strap, work another slip stitch into the next stitch, turn and loosely slip stitch back into the chain in back loops only, with a final slip stitch into the stitch next to the one in the back, repeat as needed
before fastening off, you could try it on for size to make sure the strap fits, leave a 10” tail when fastening off
repeat the process for the other strap, use the tails to reinforce each strap, weaving it into at least a few rows to hold it up


