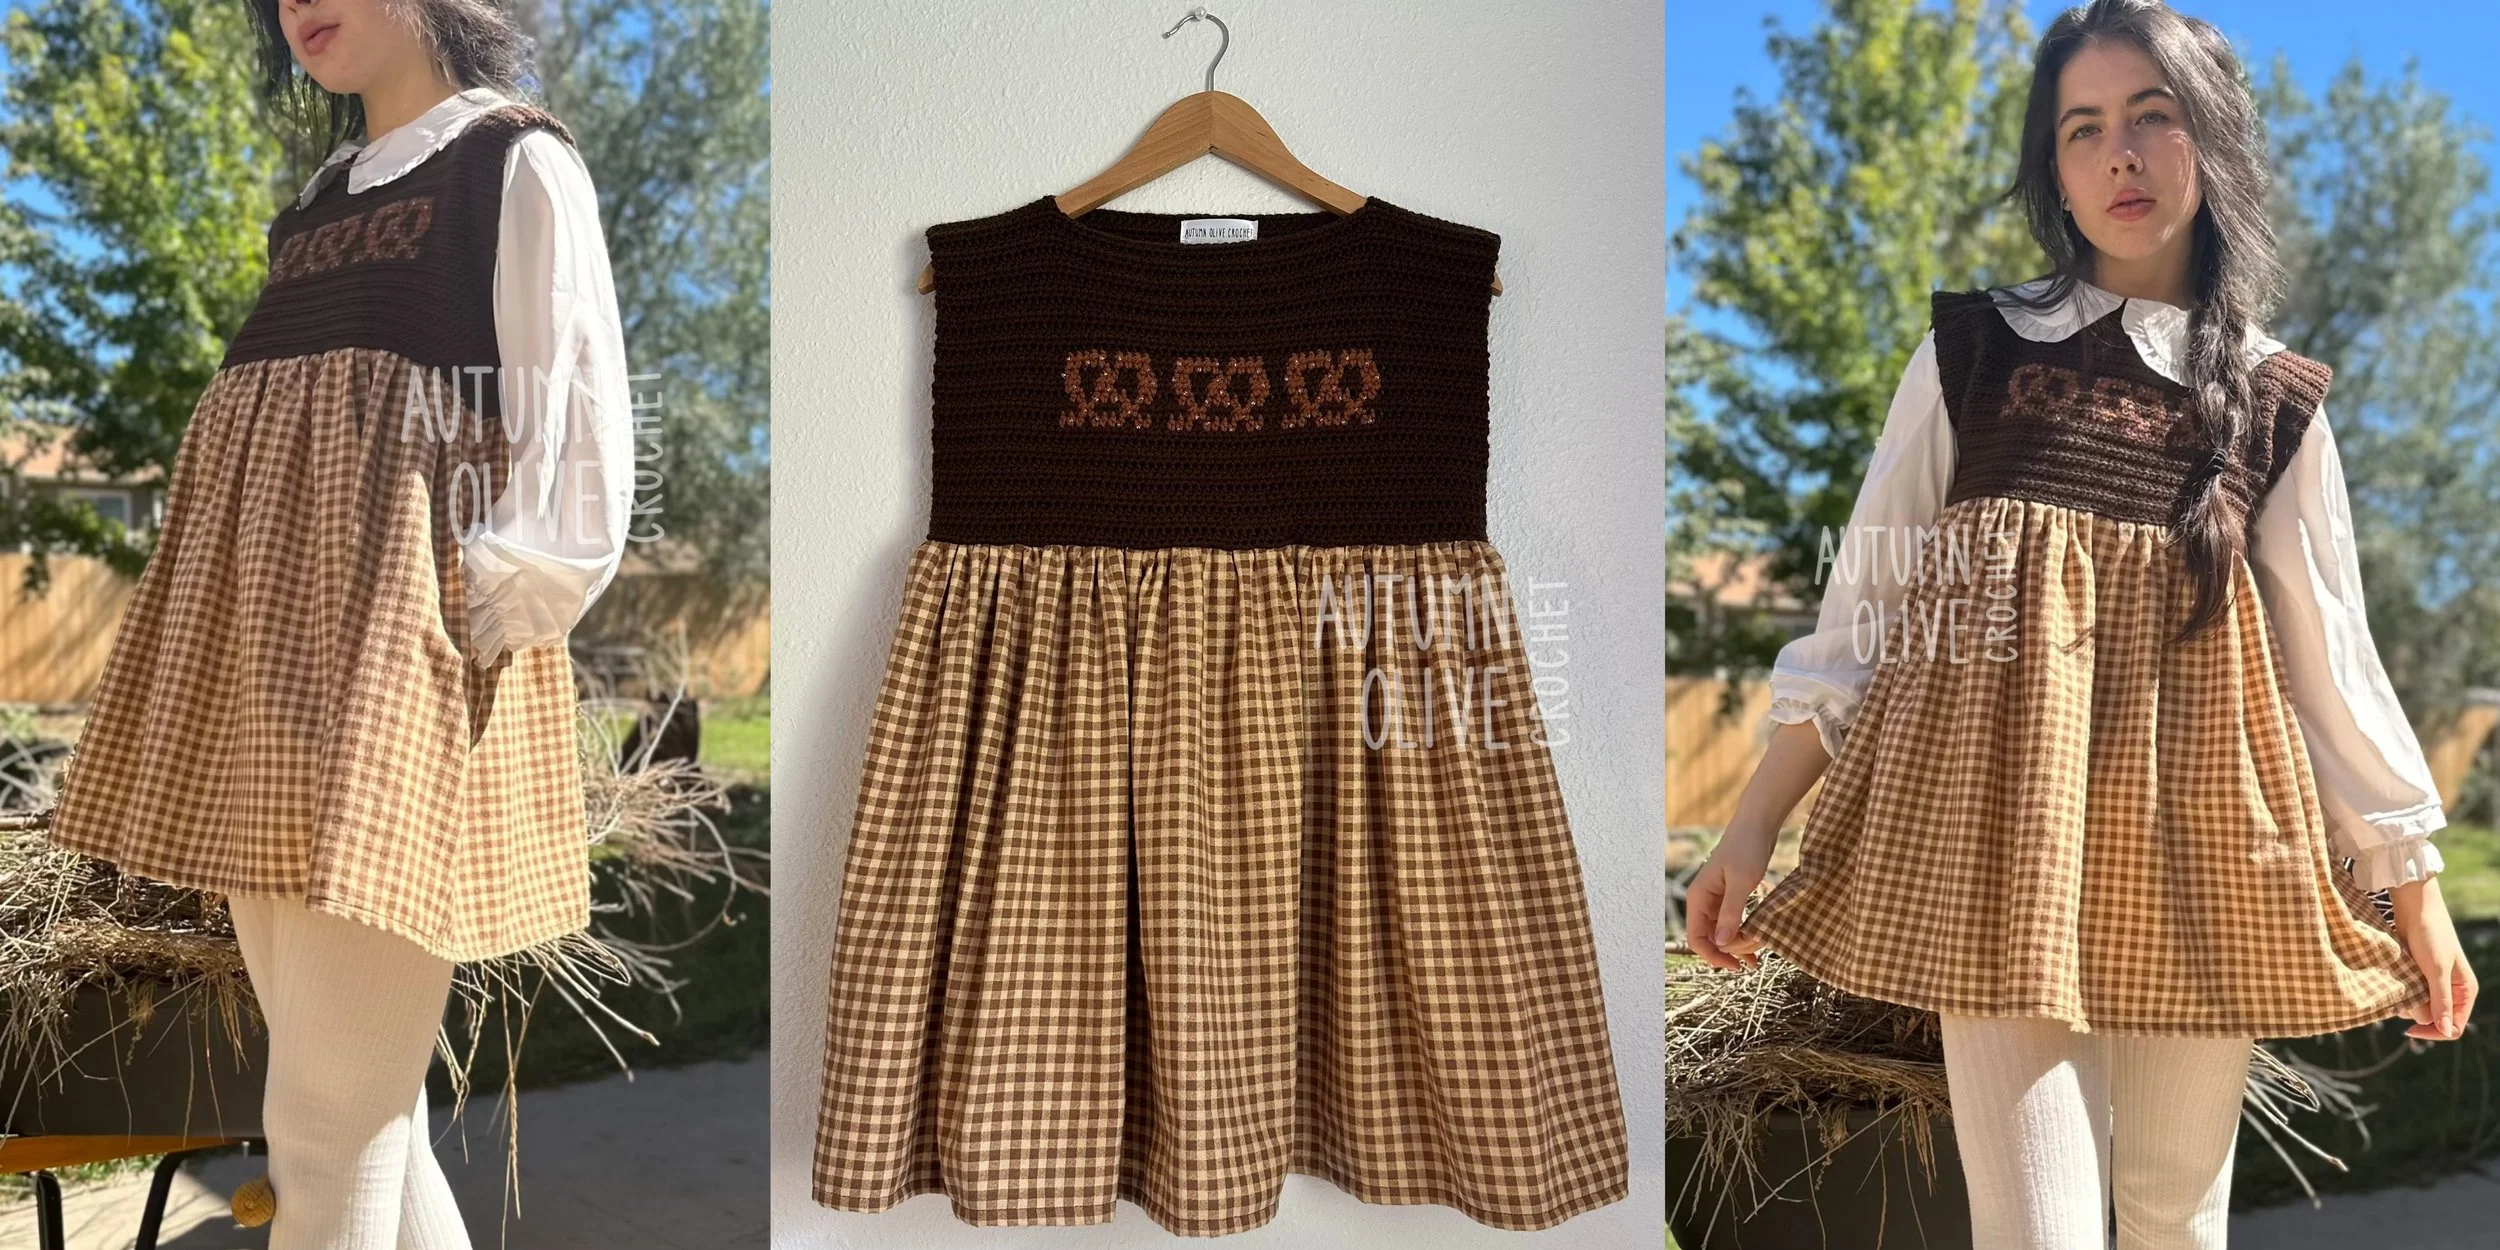
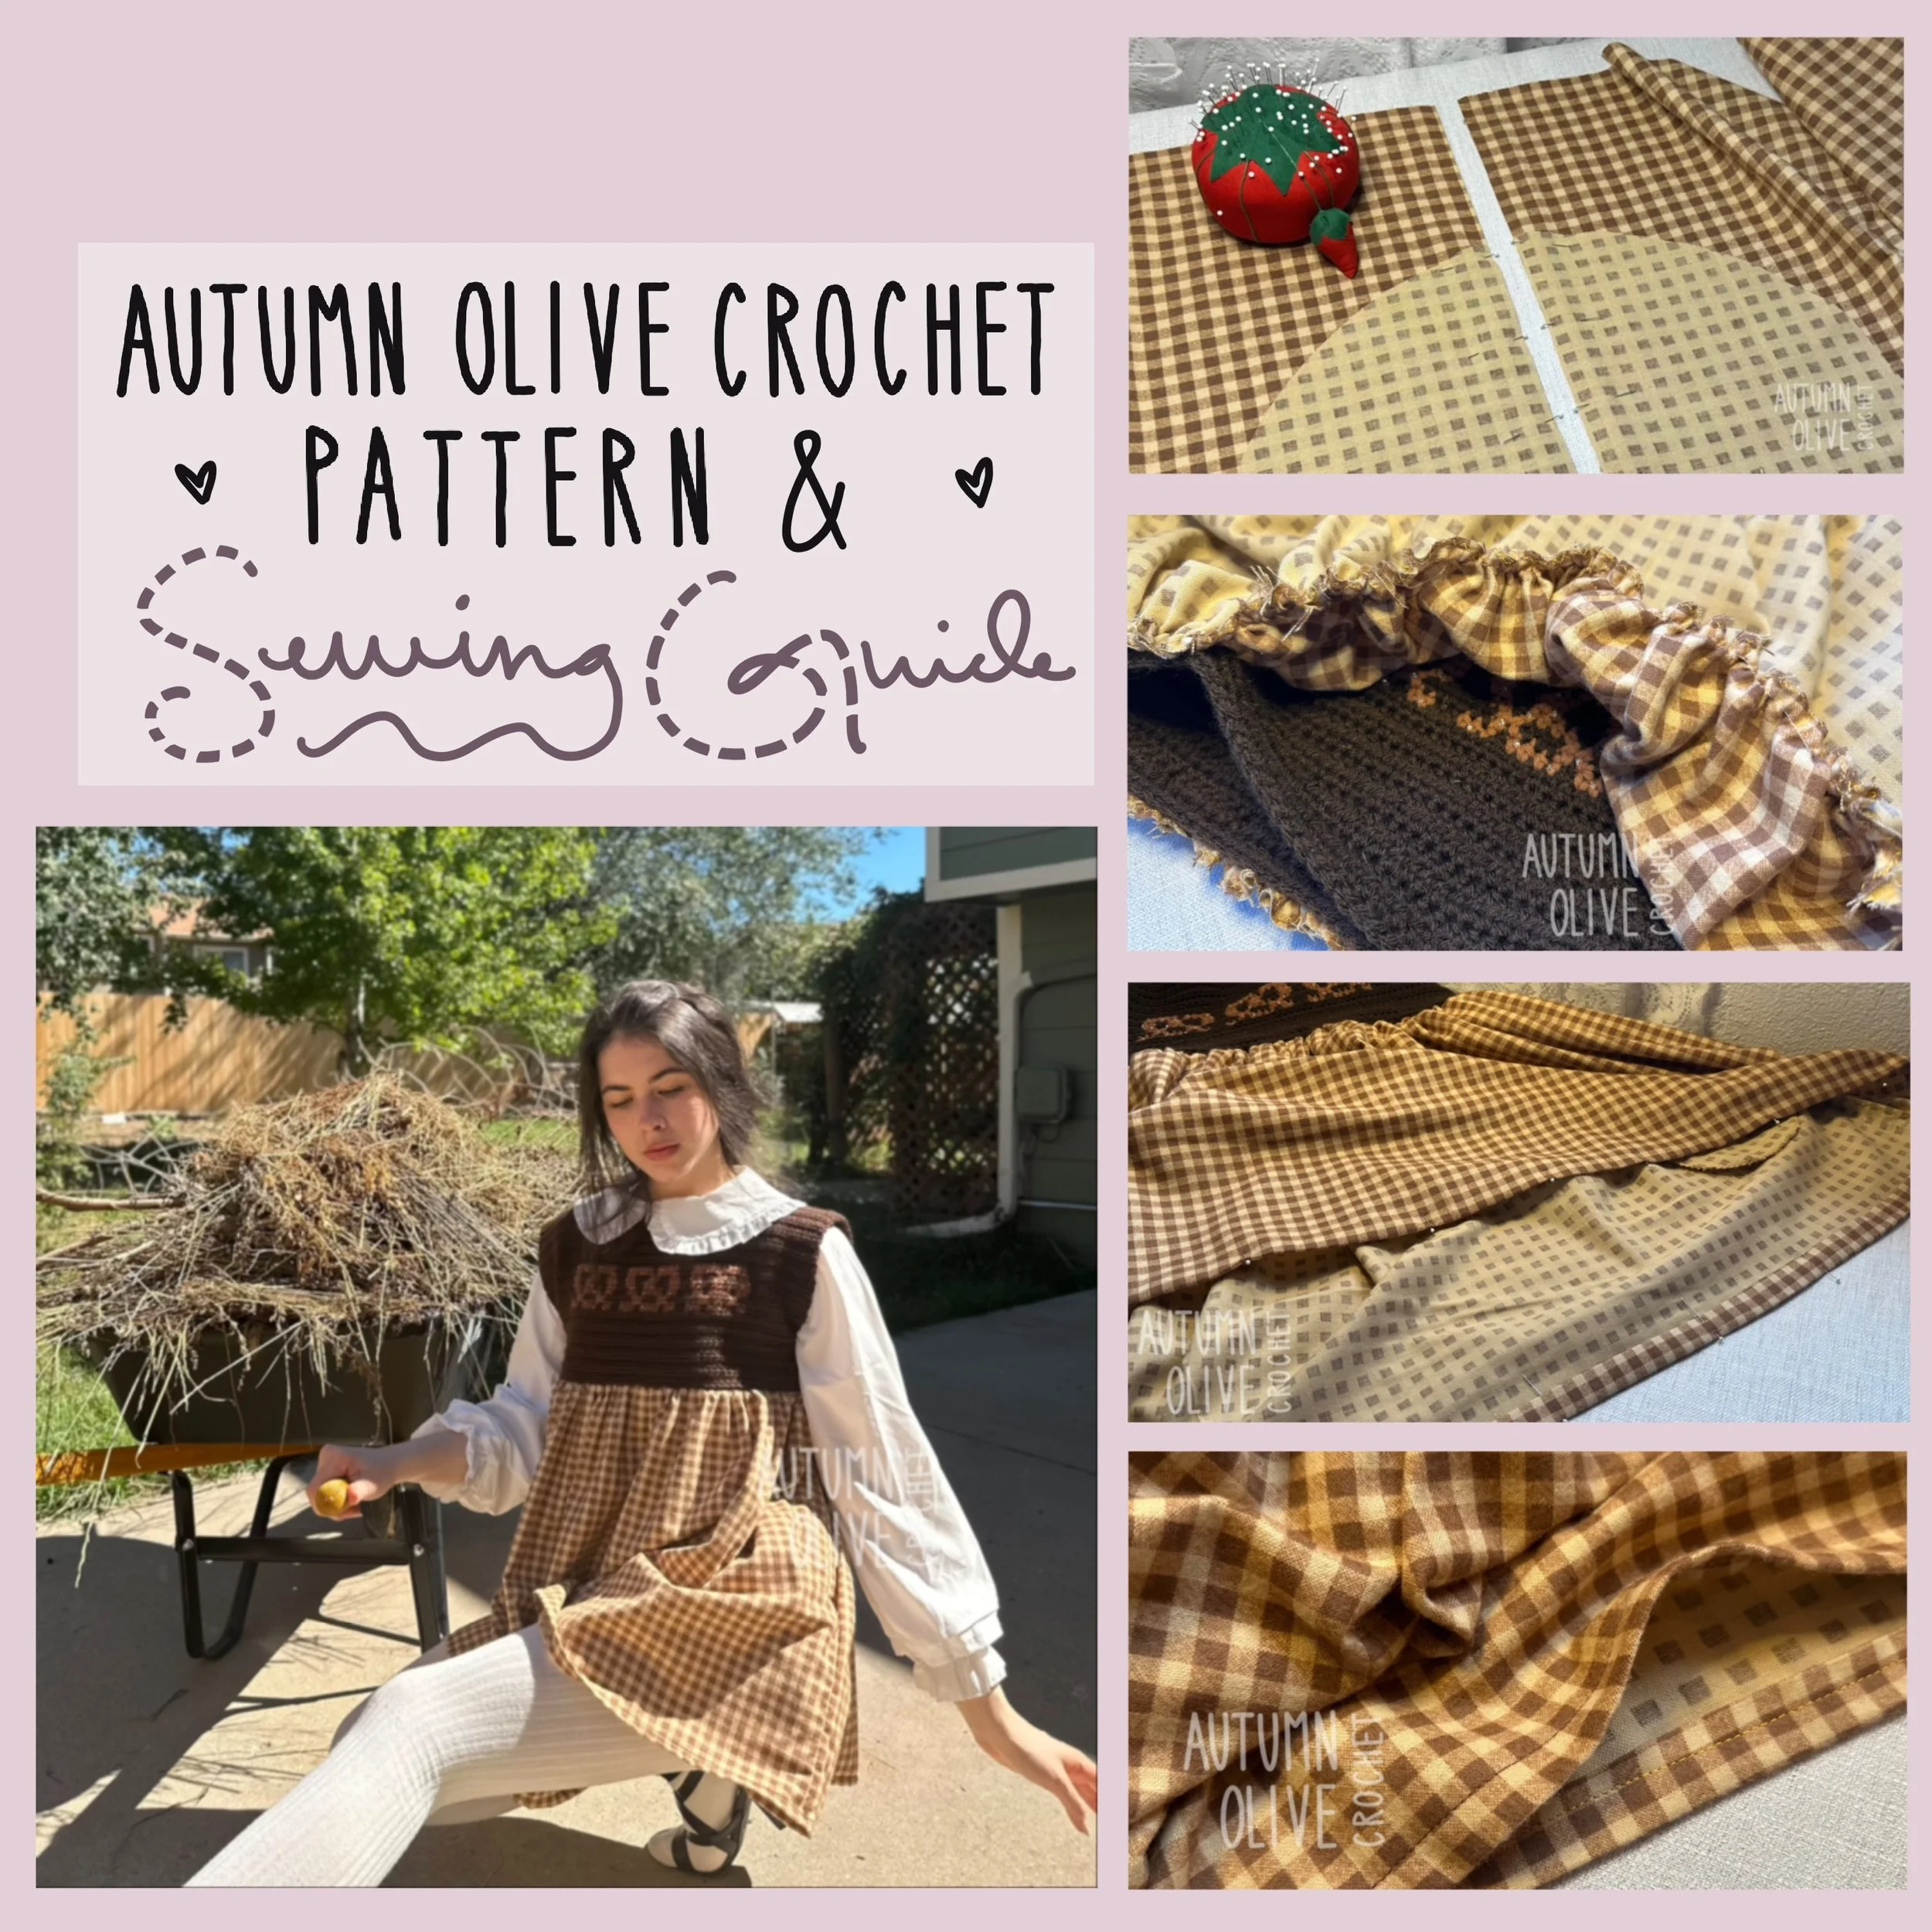
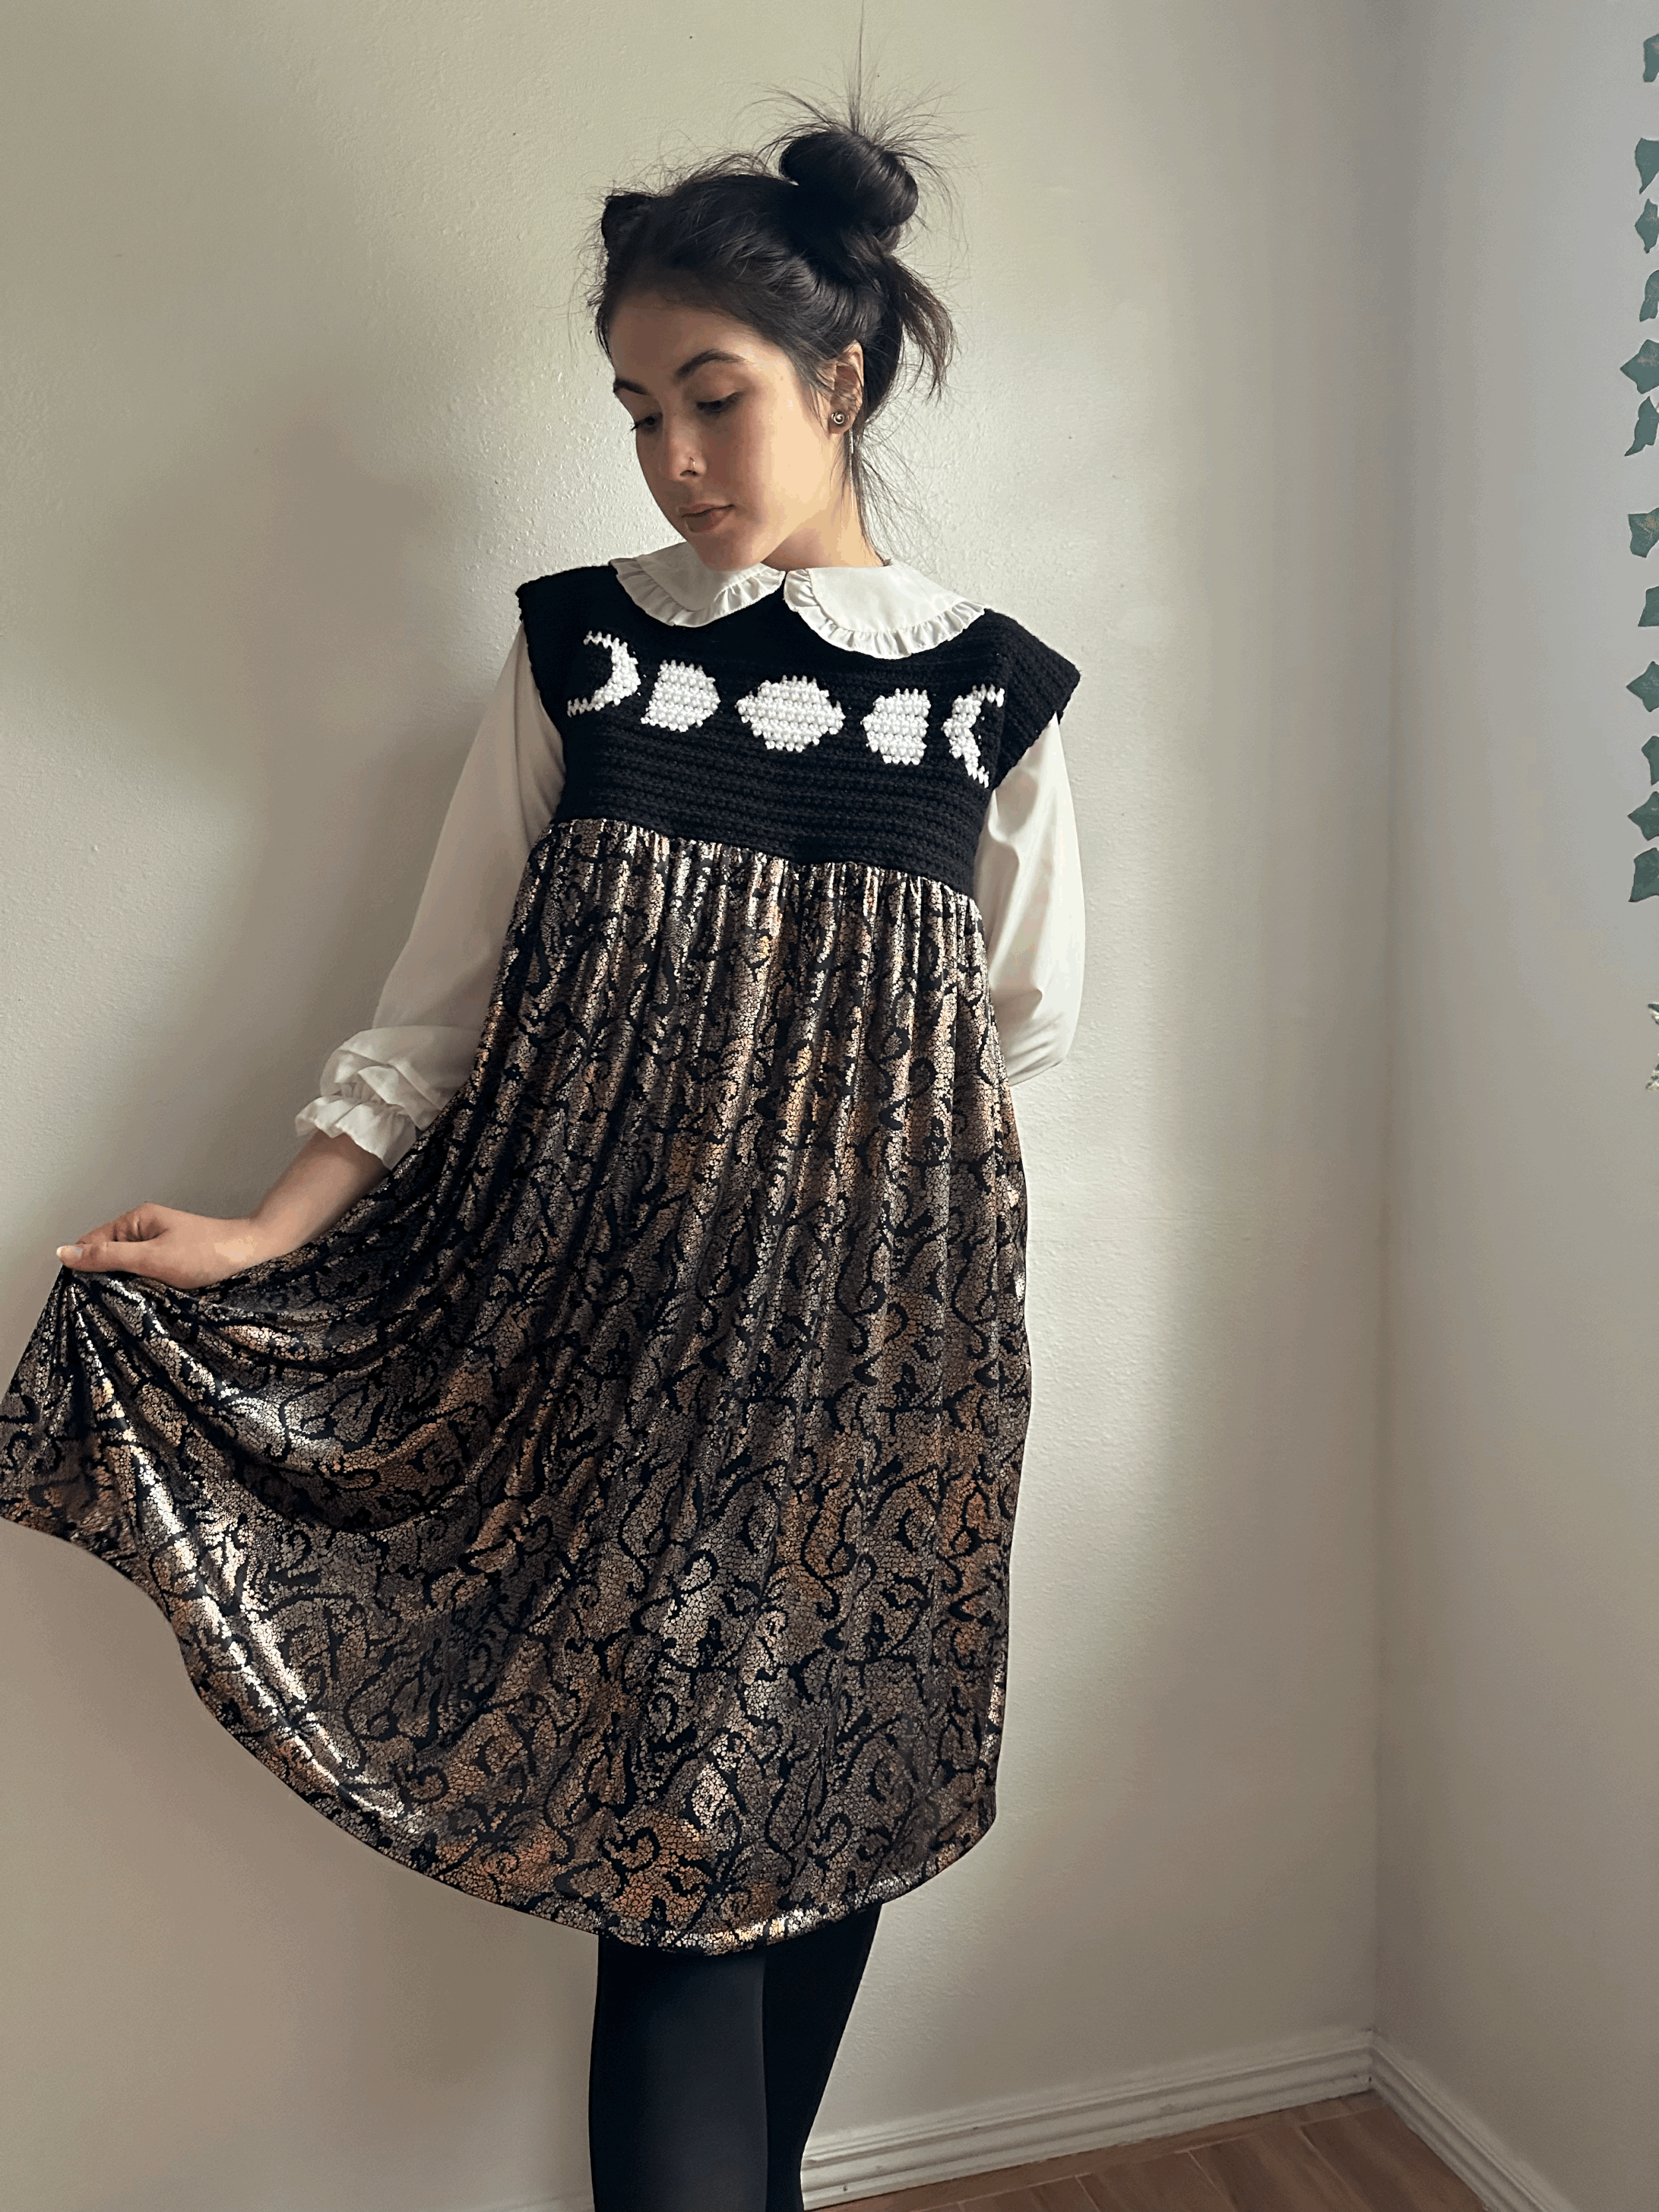
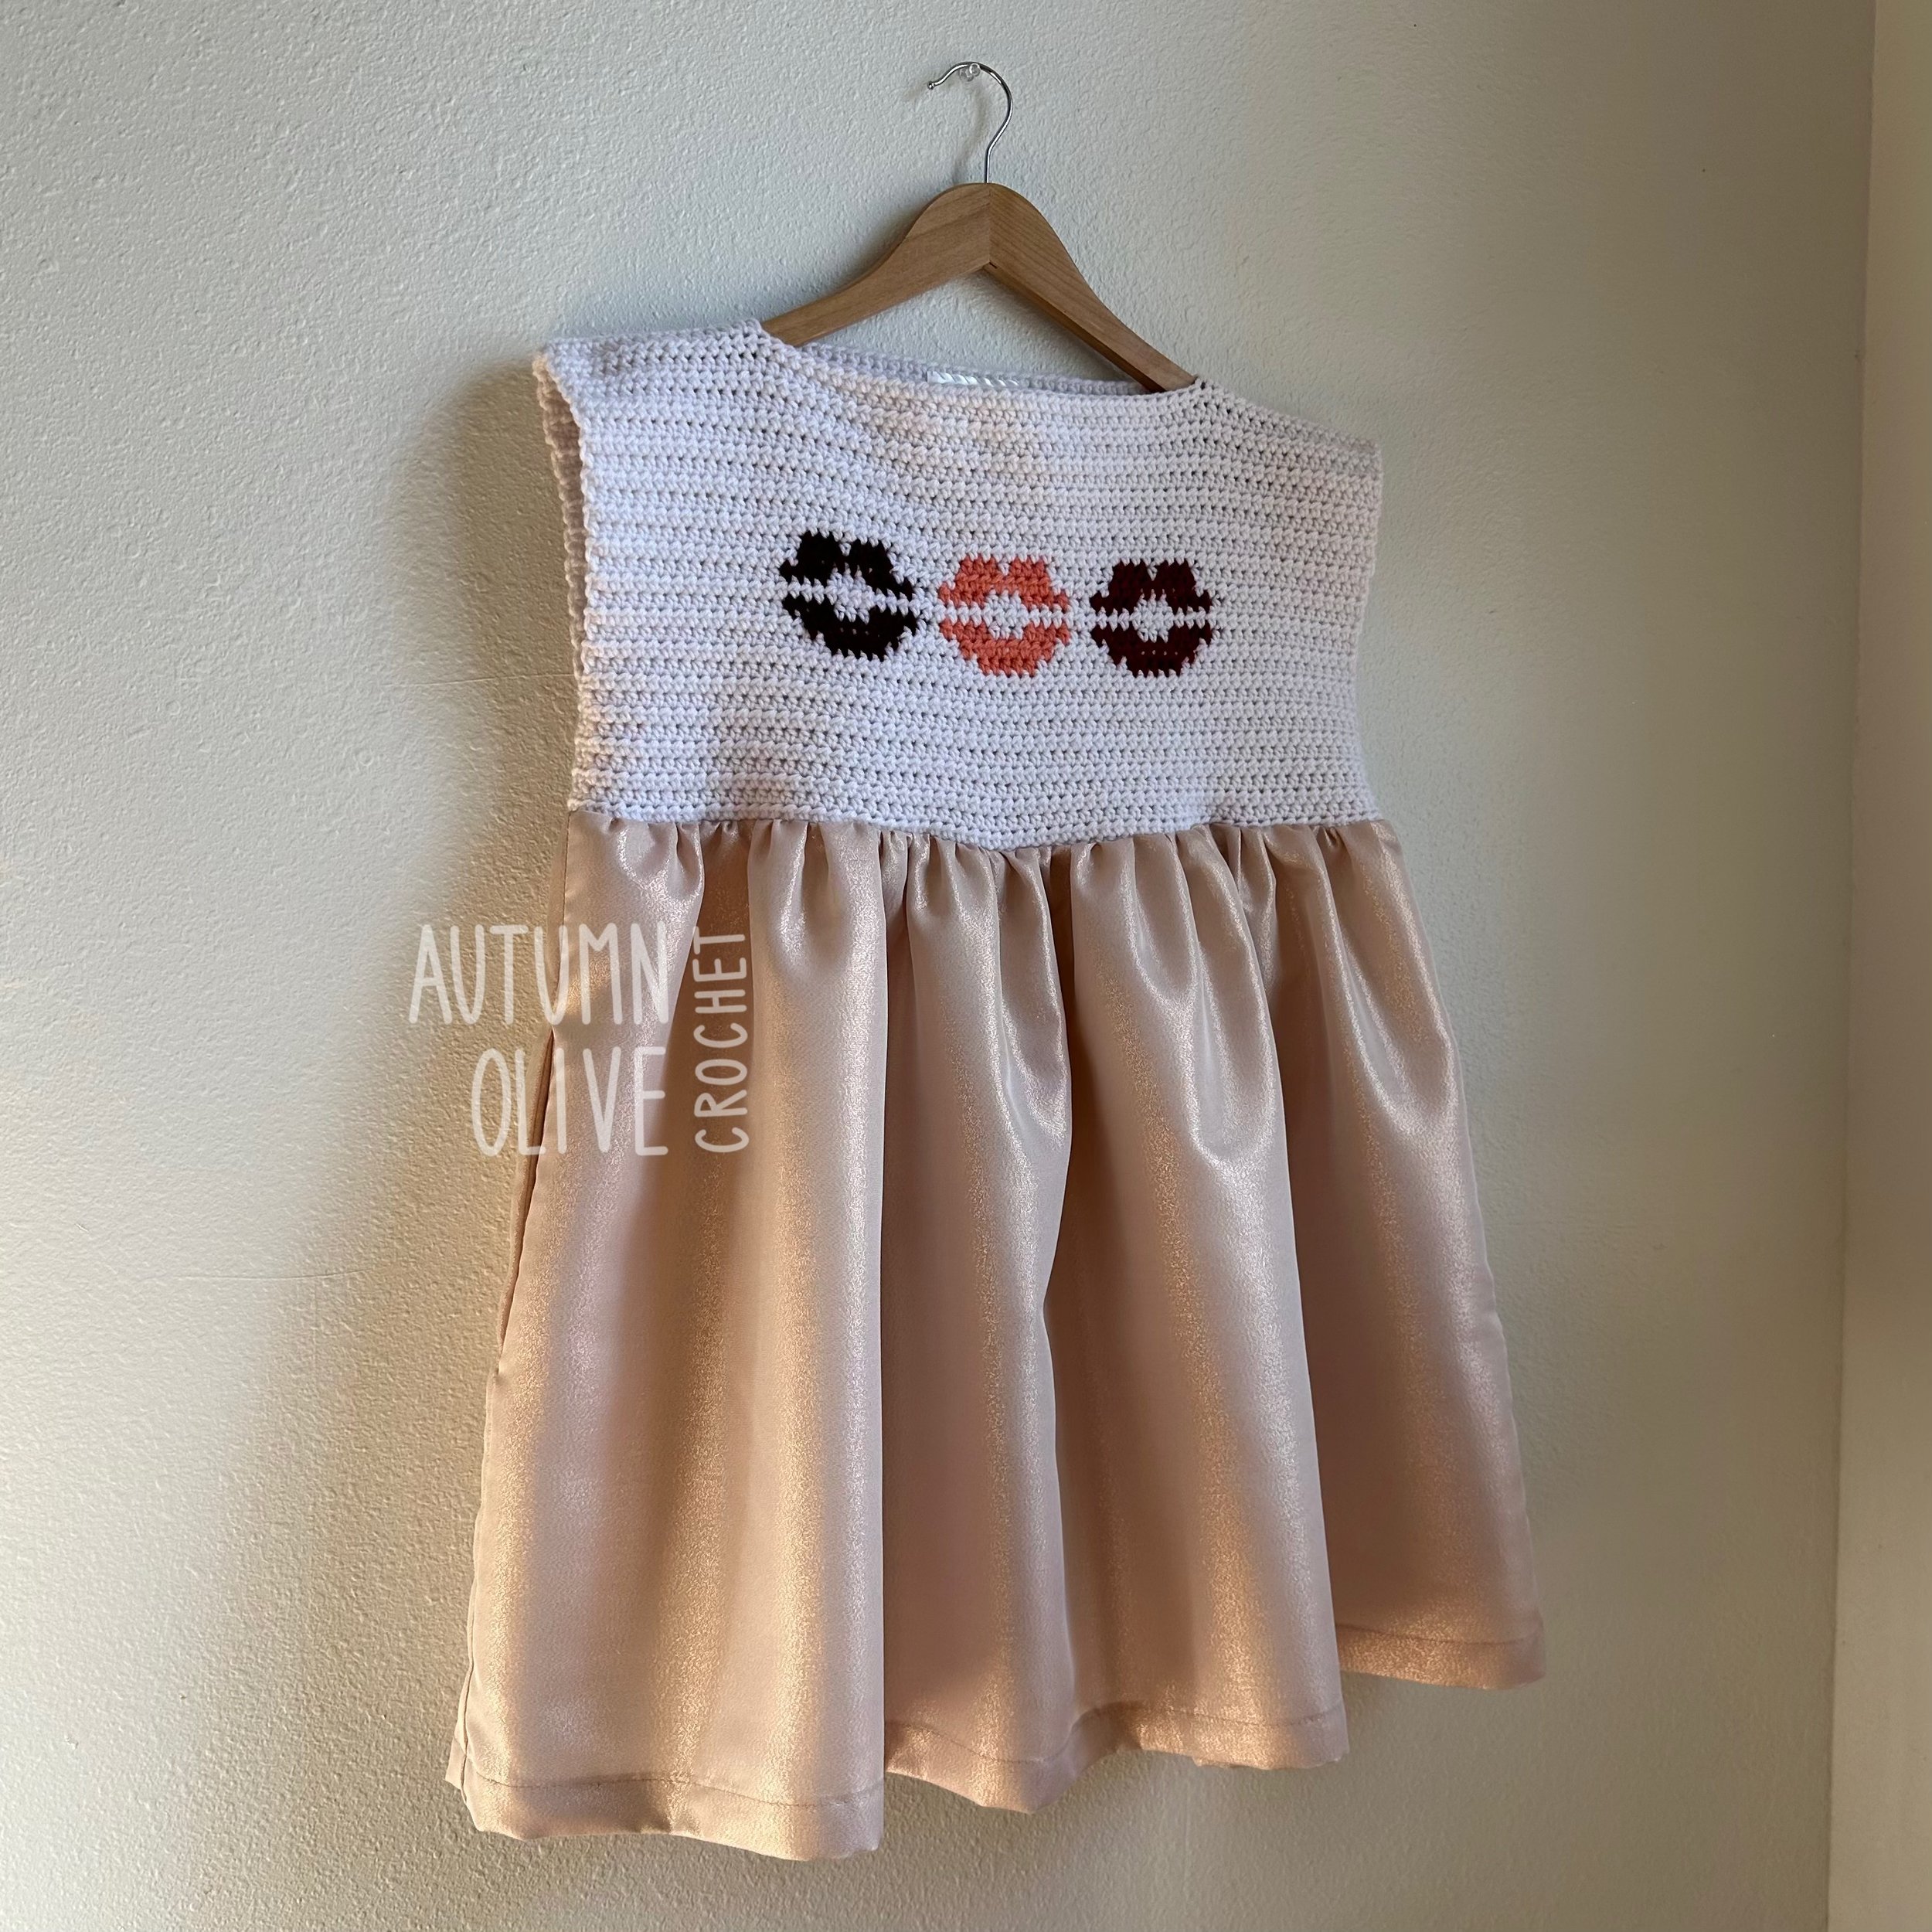
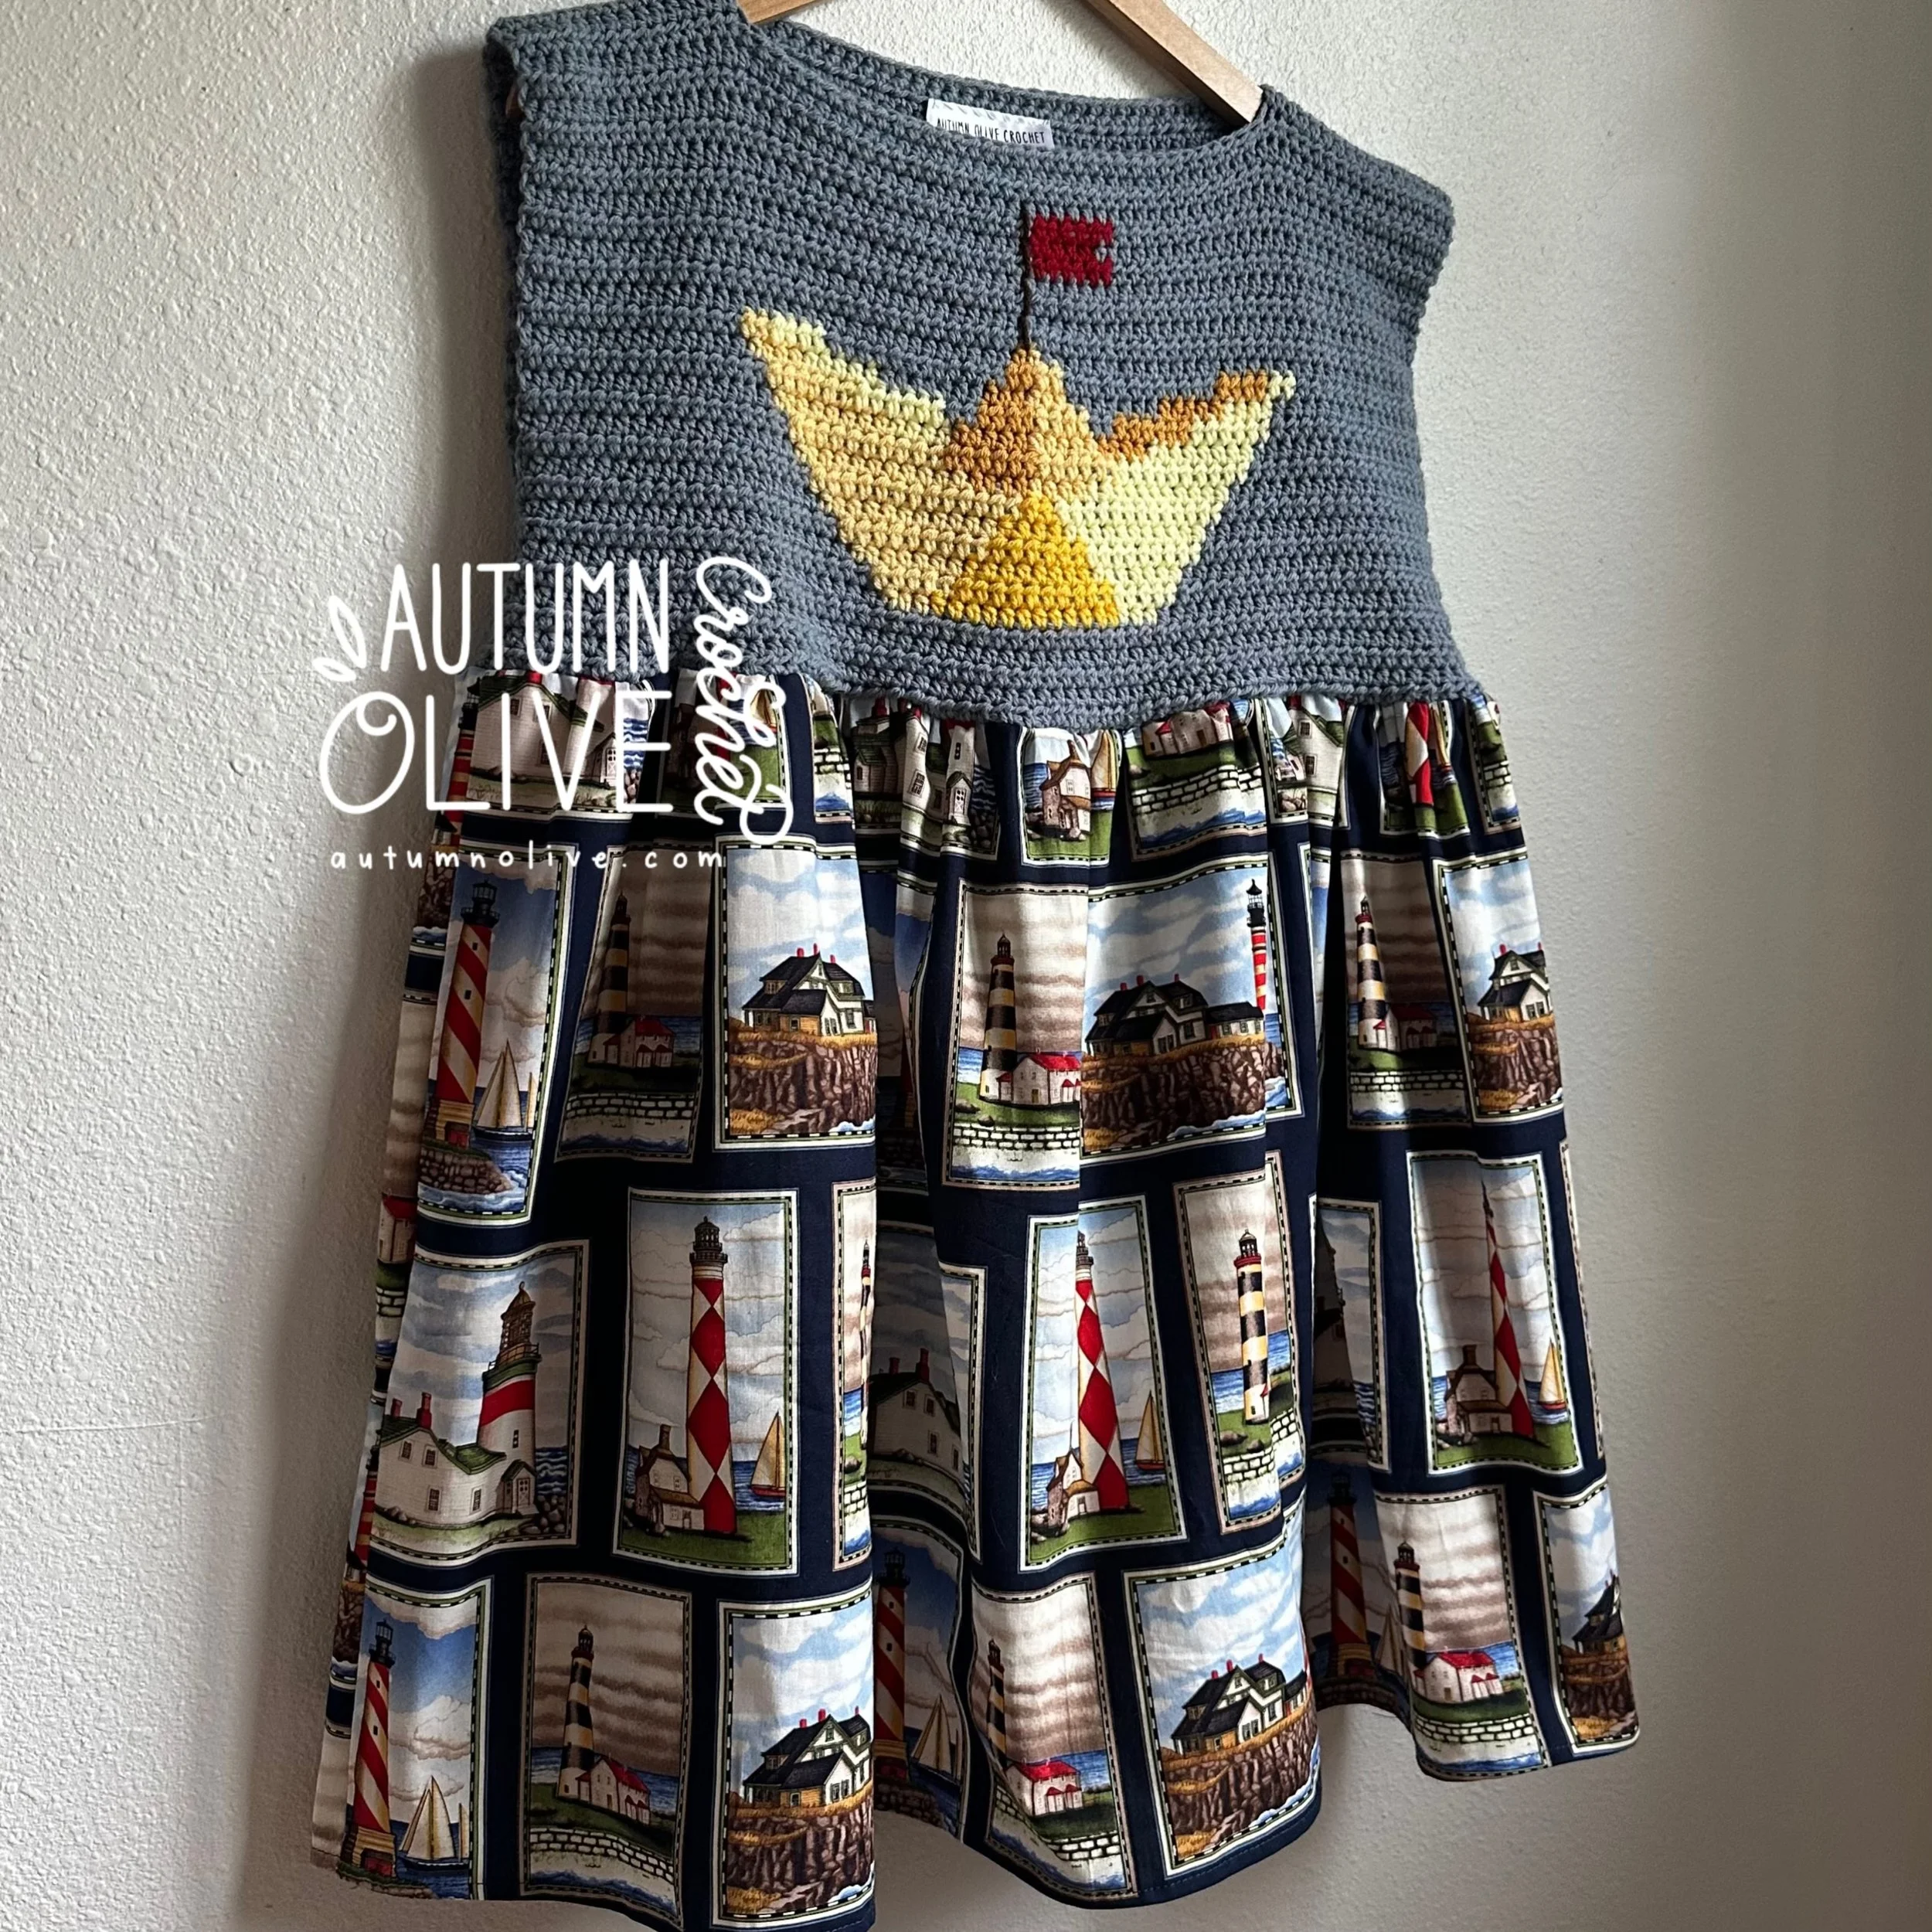
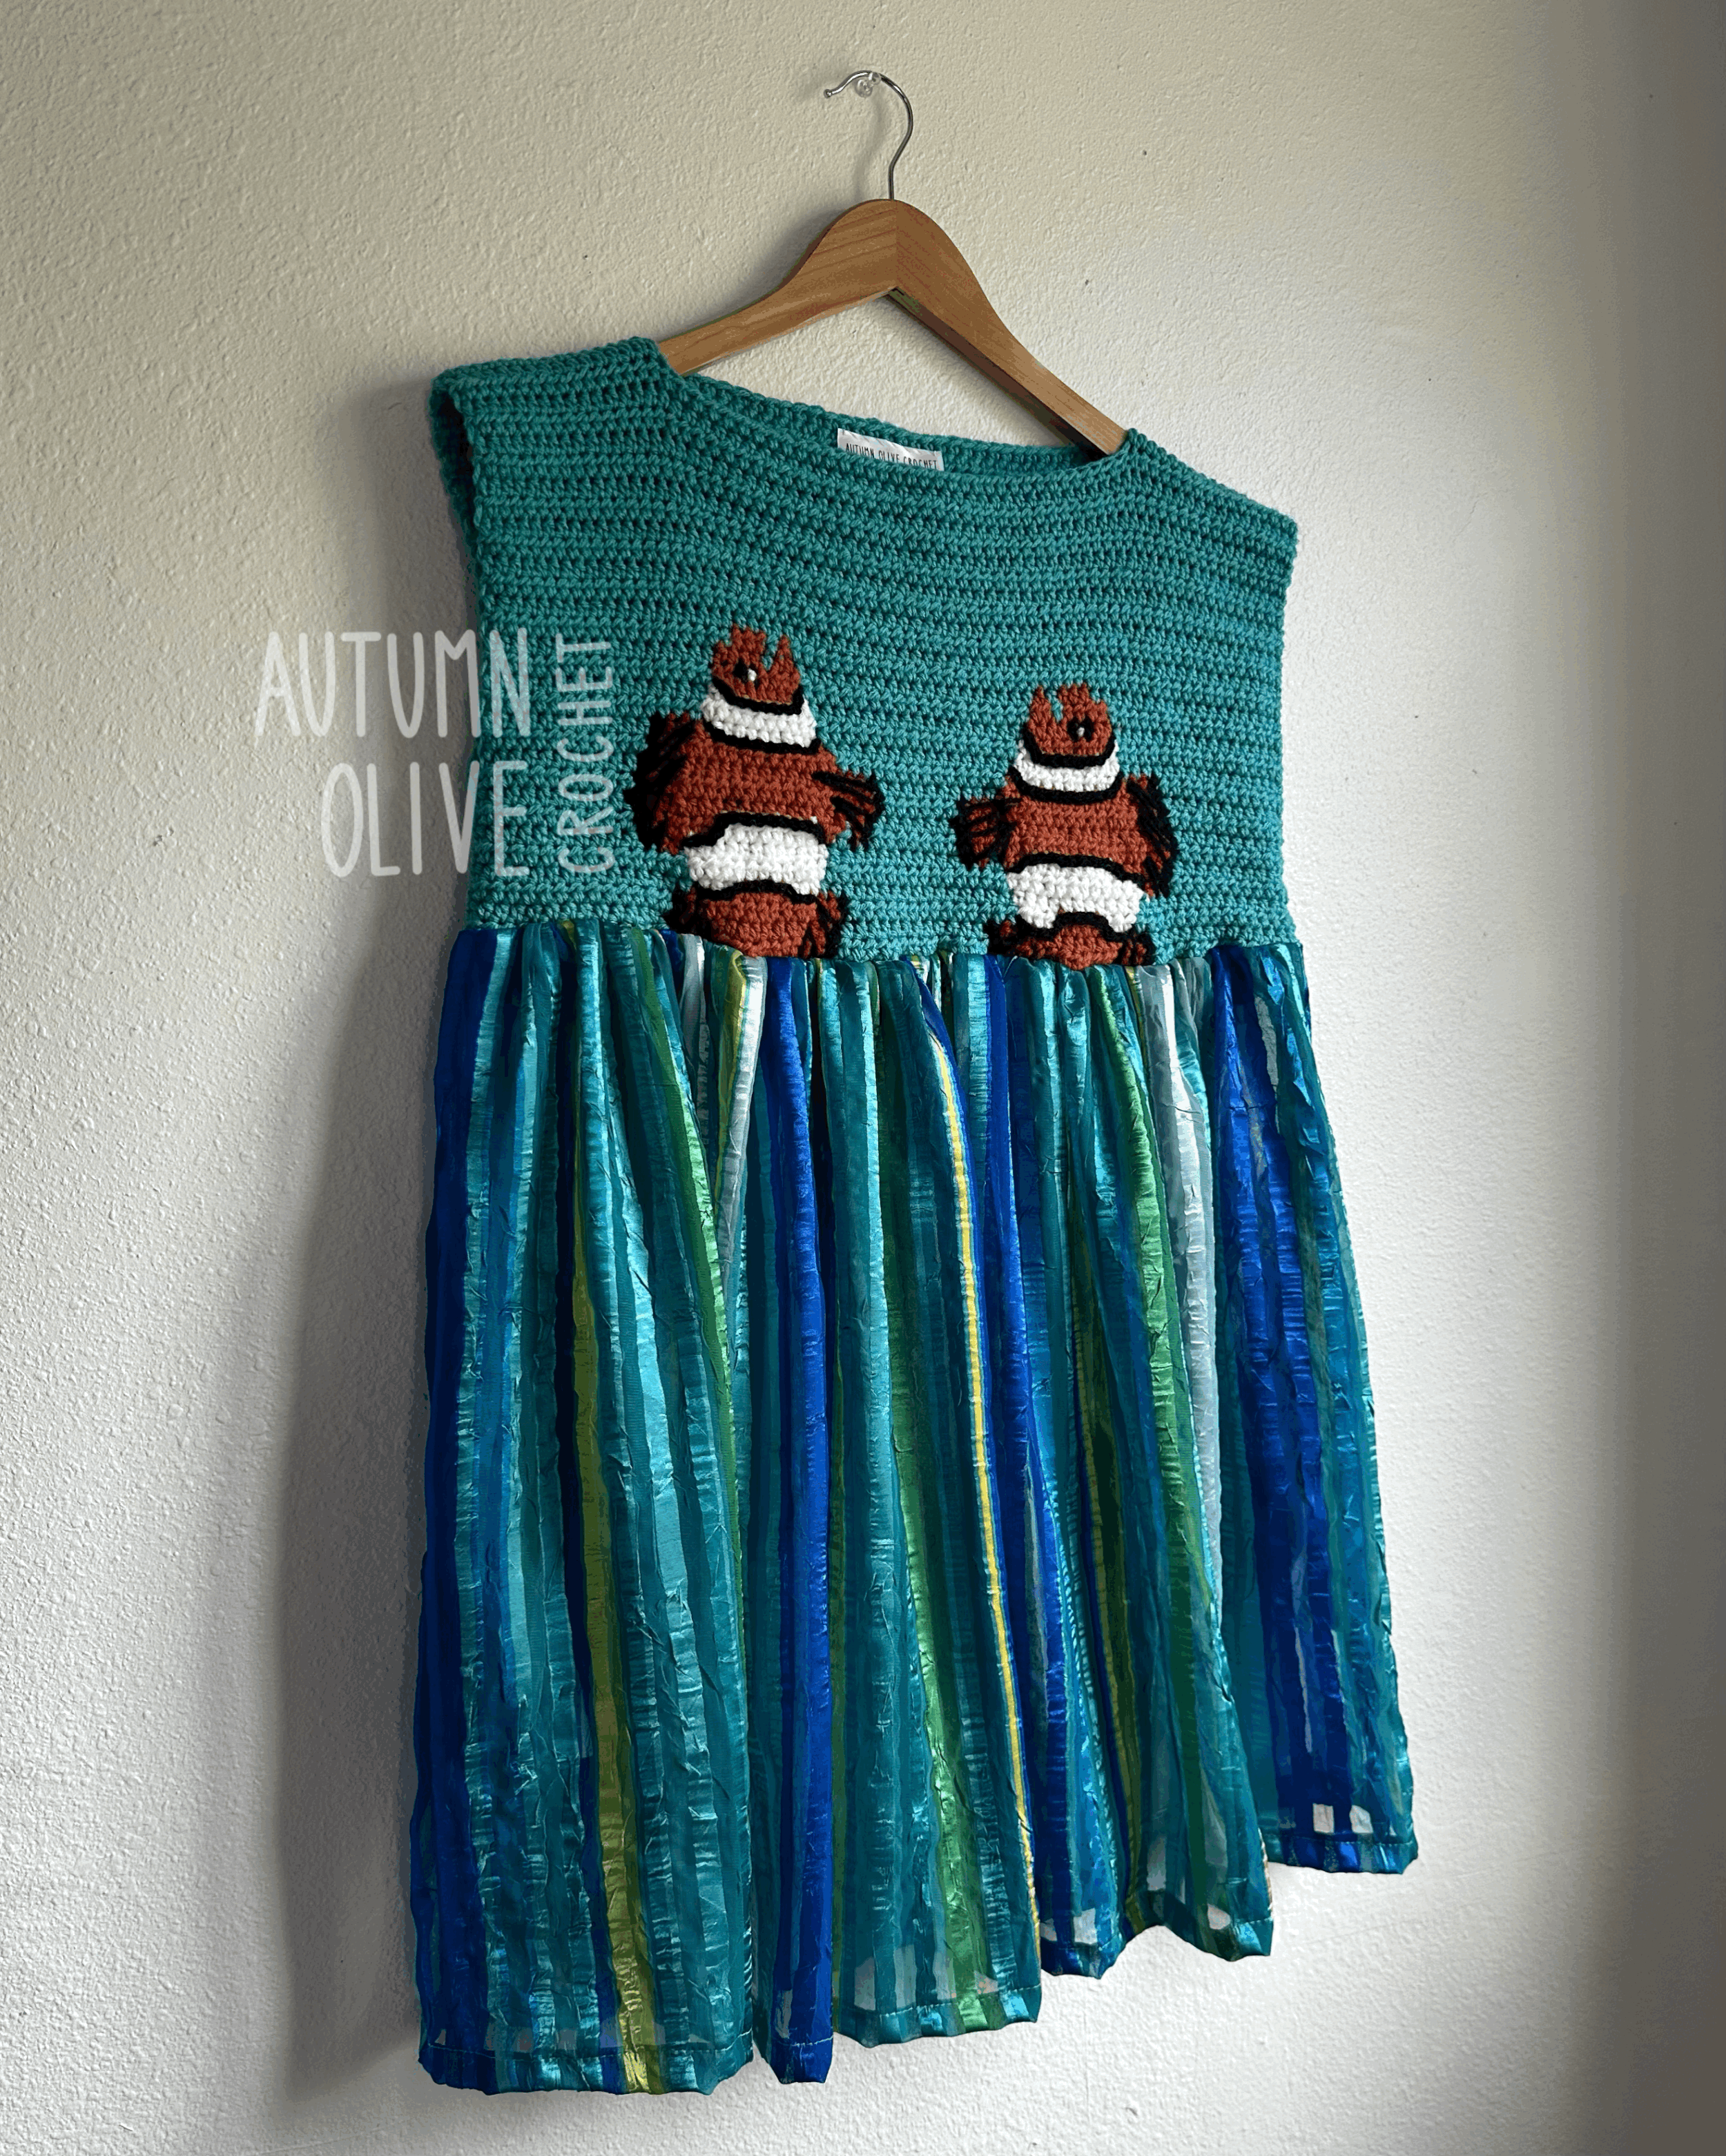
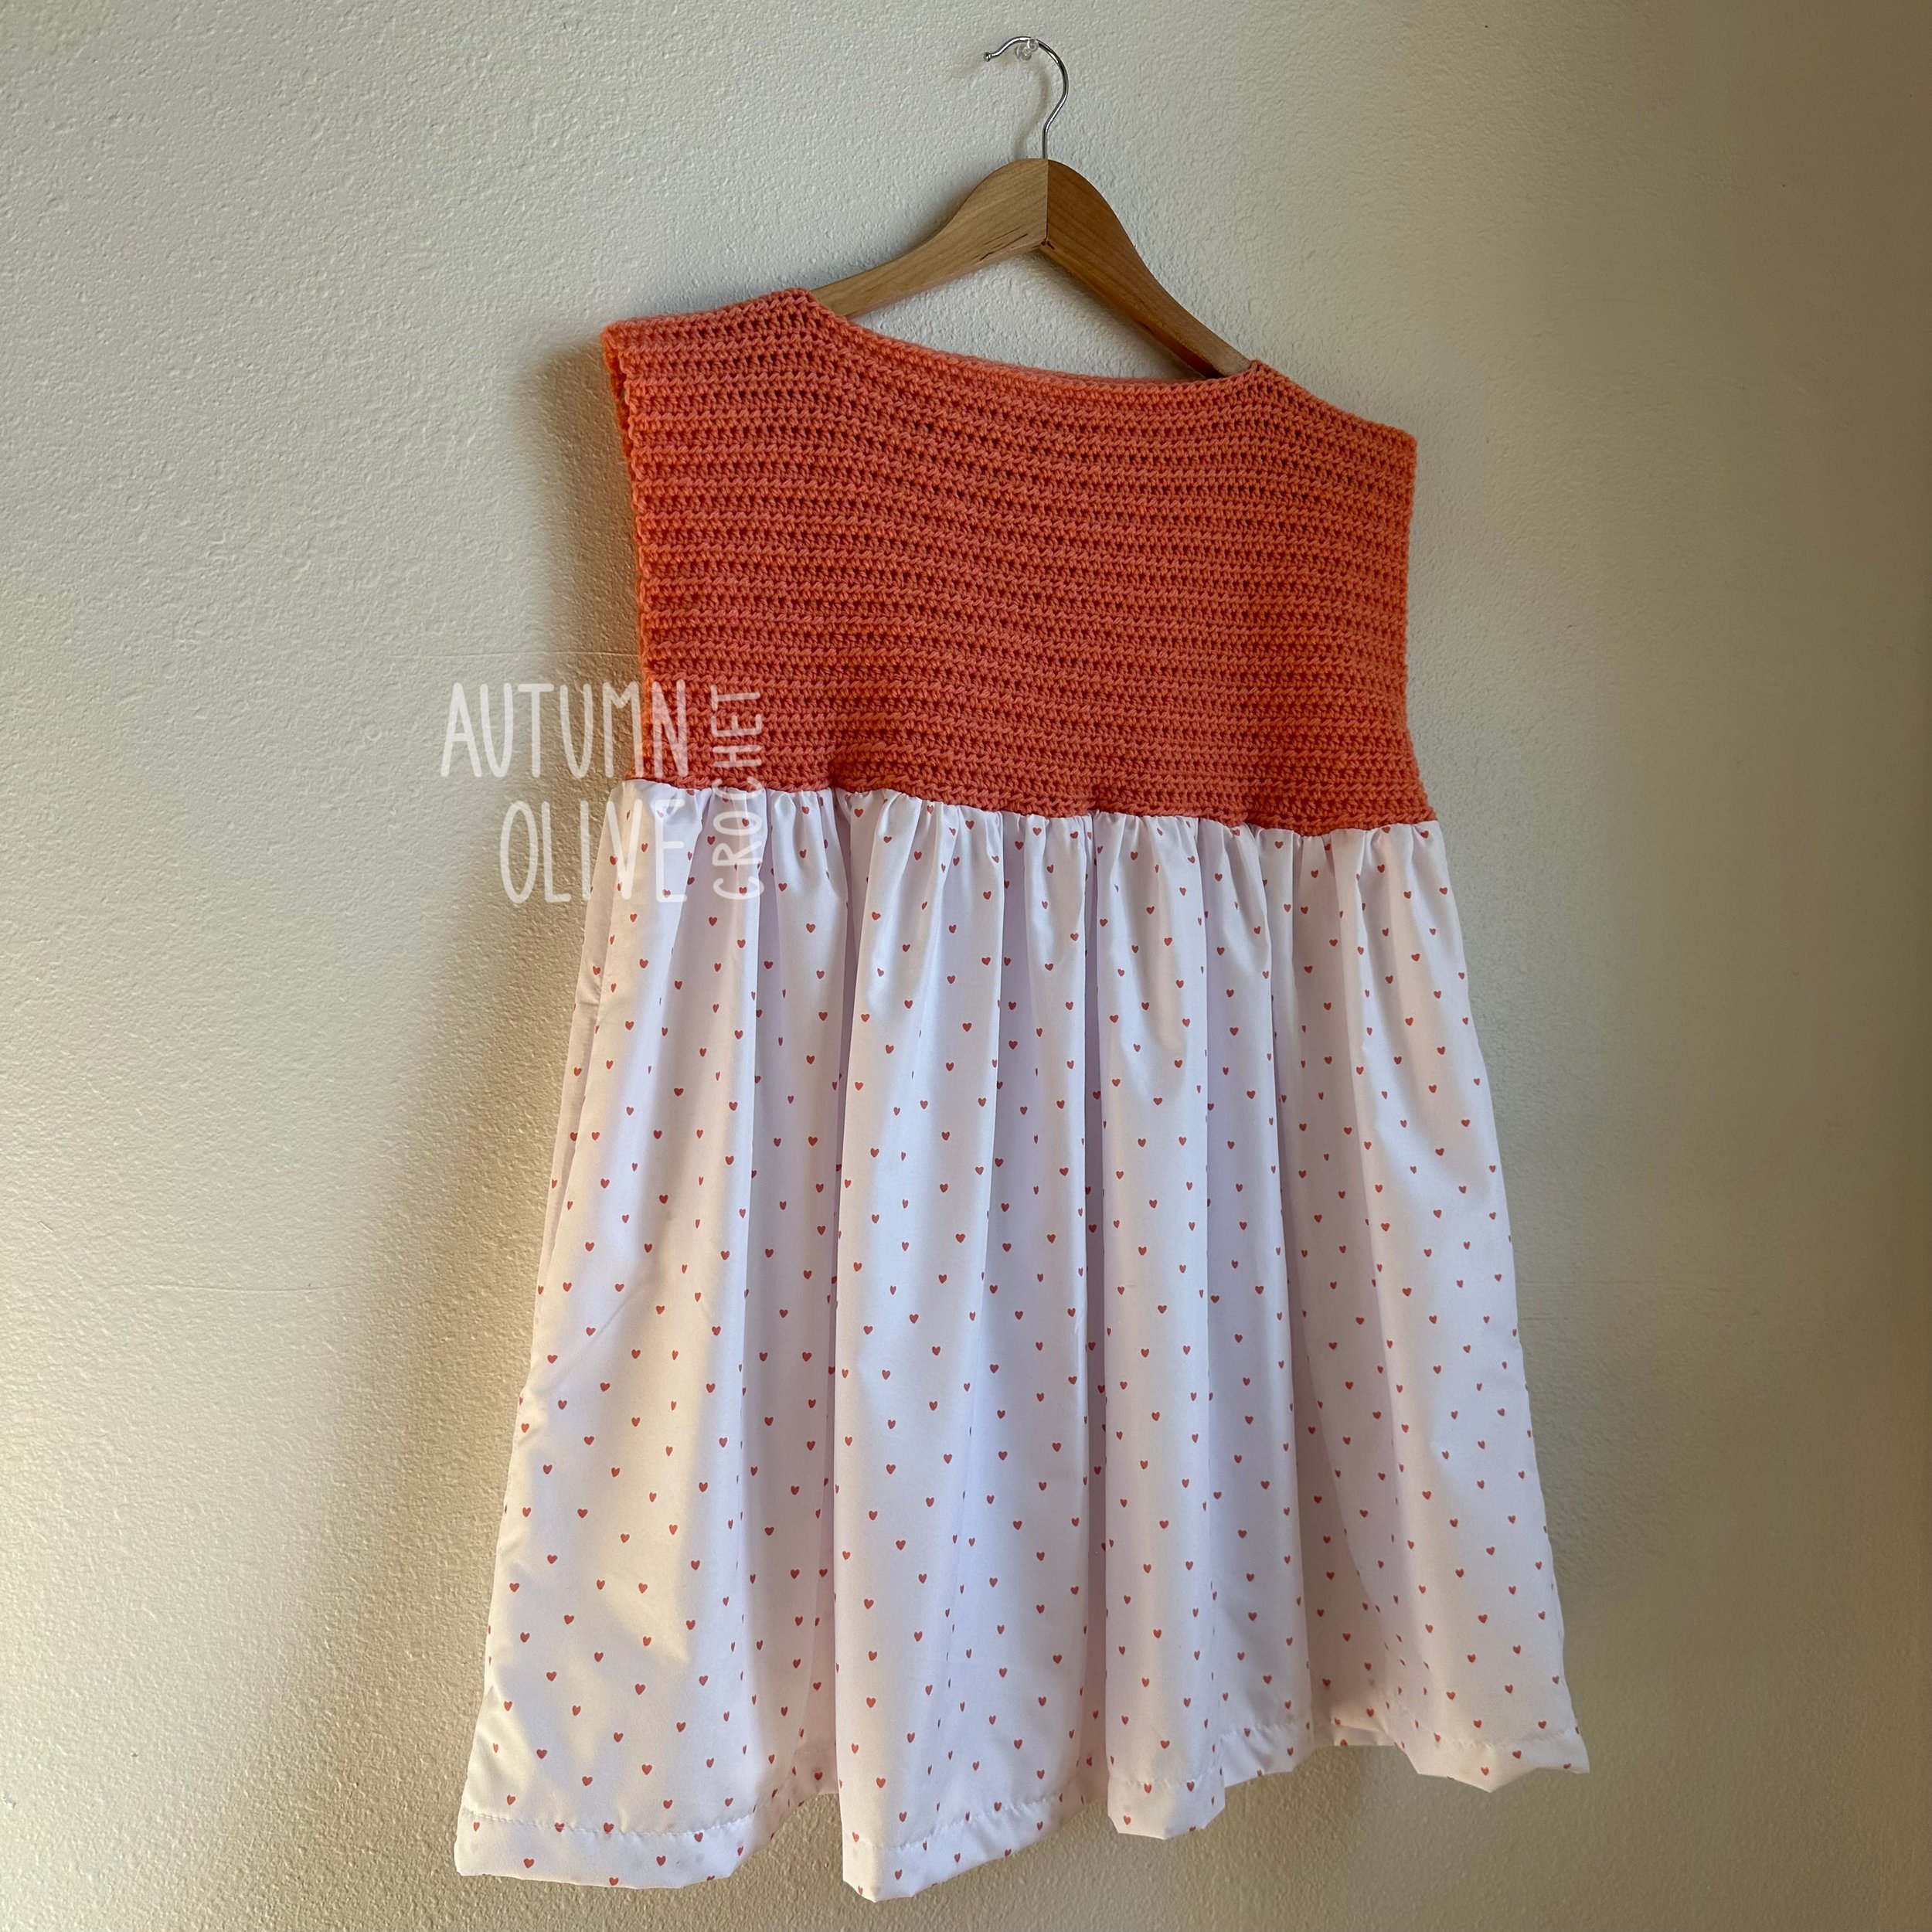
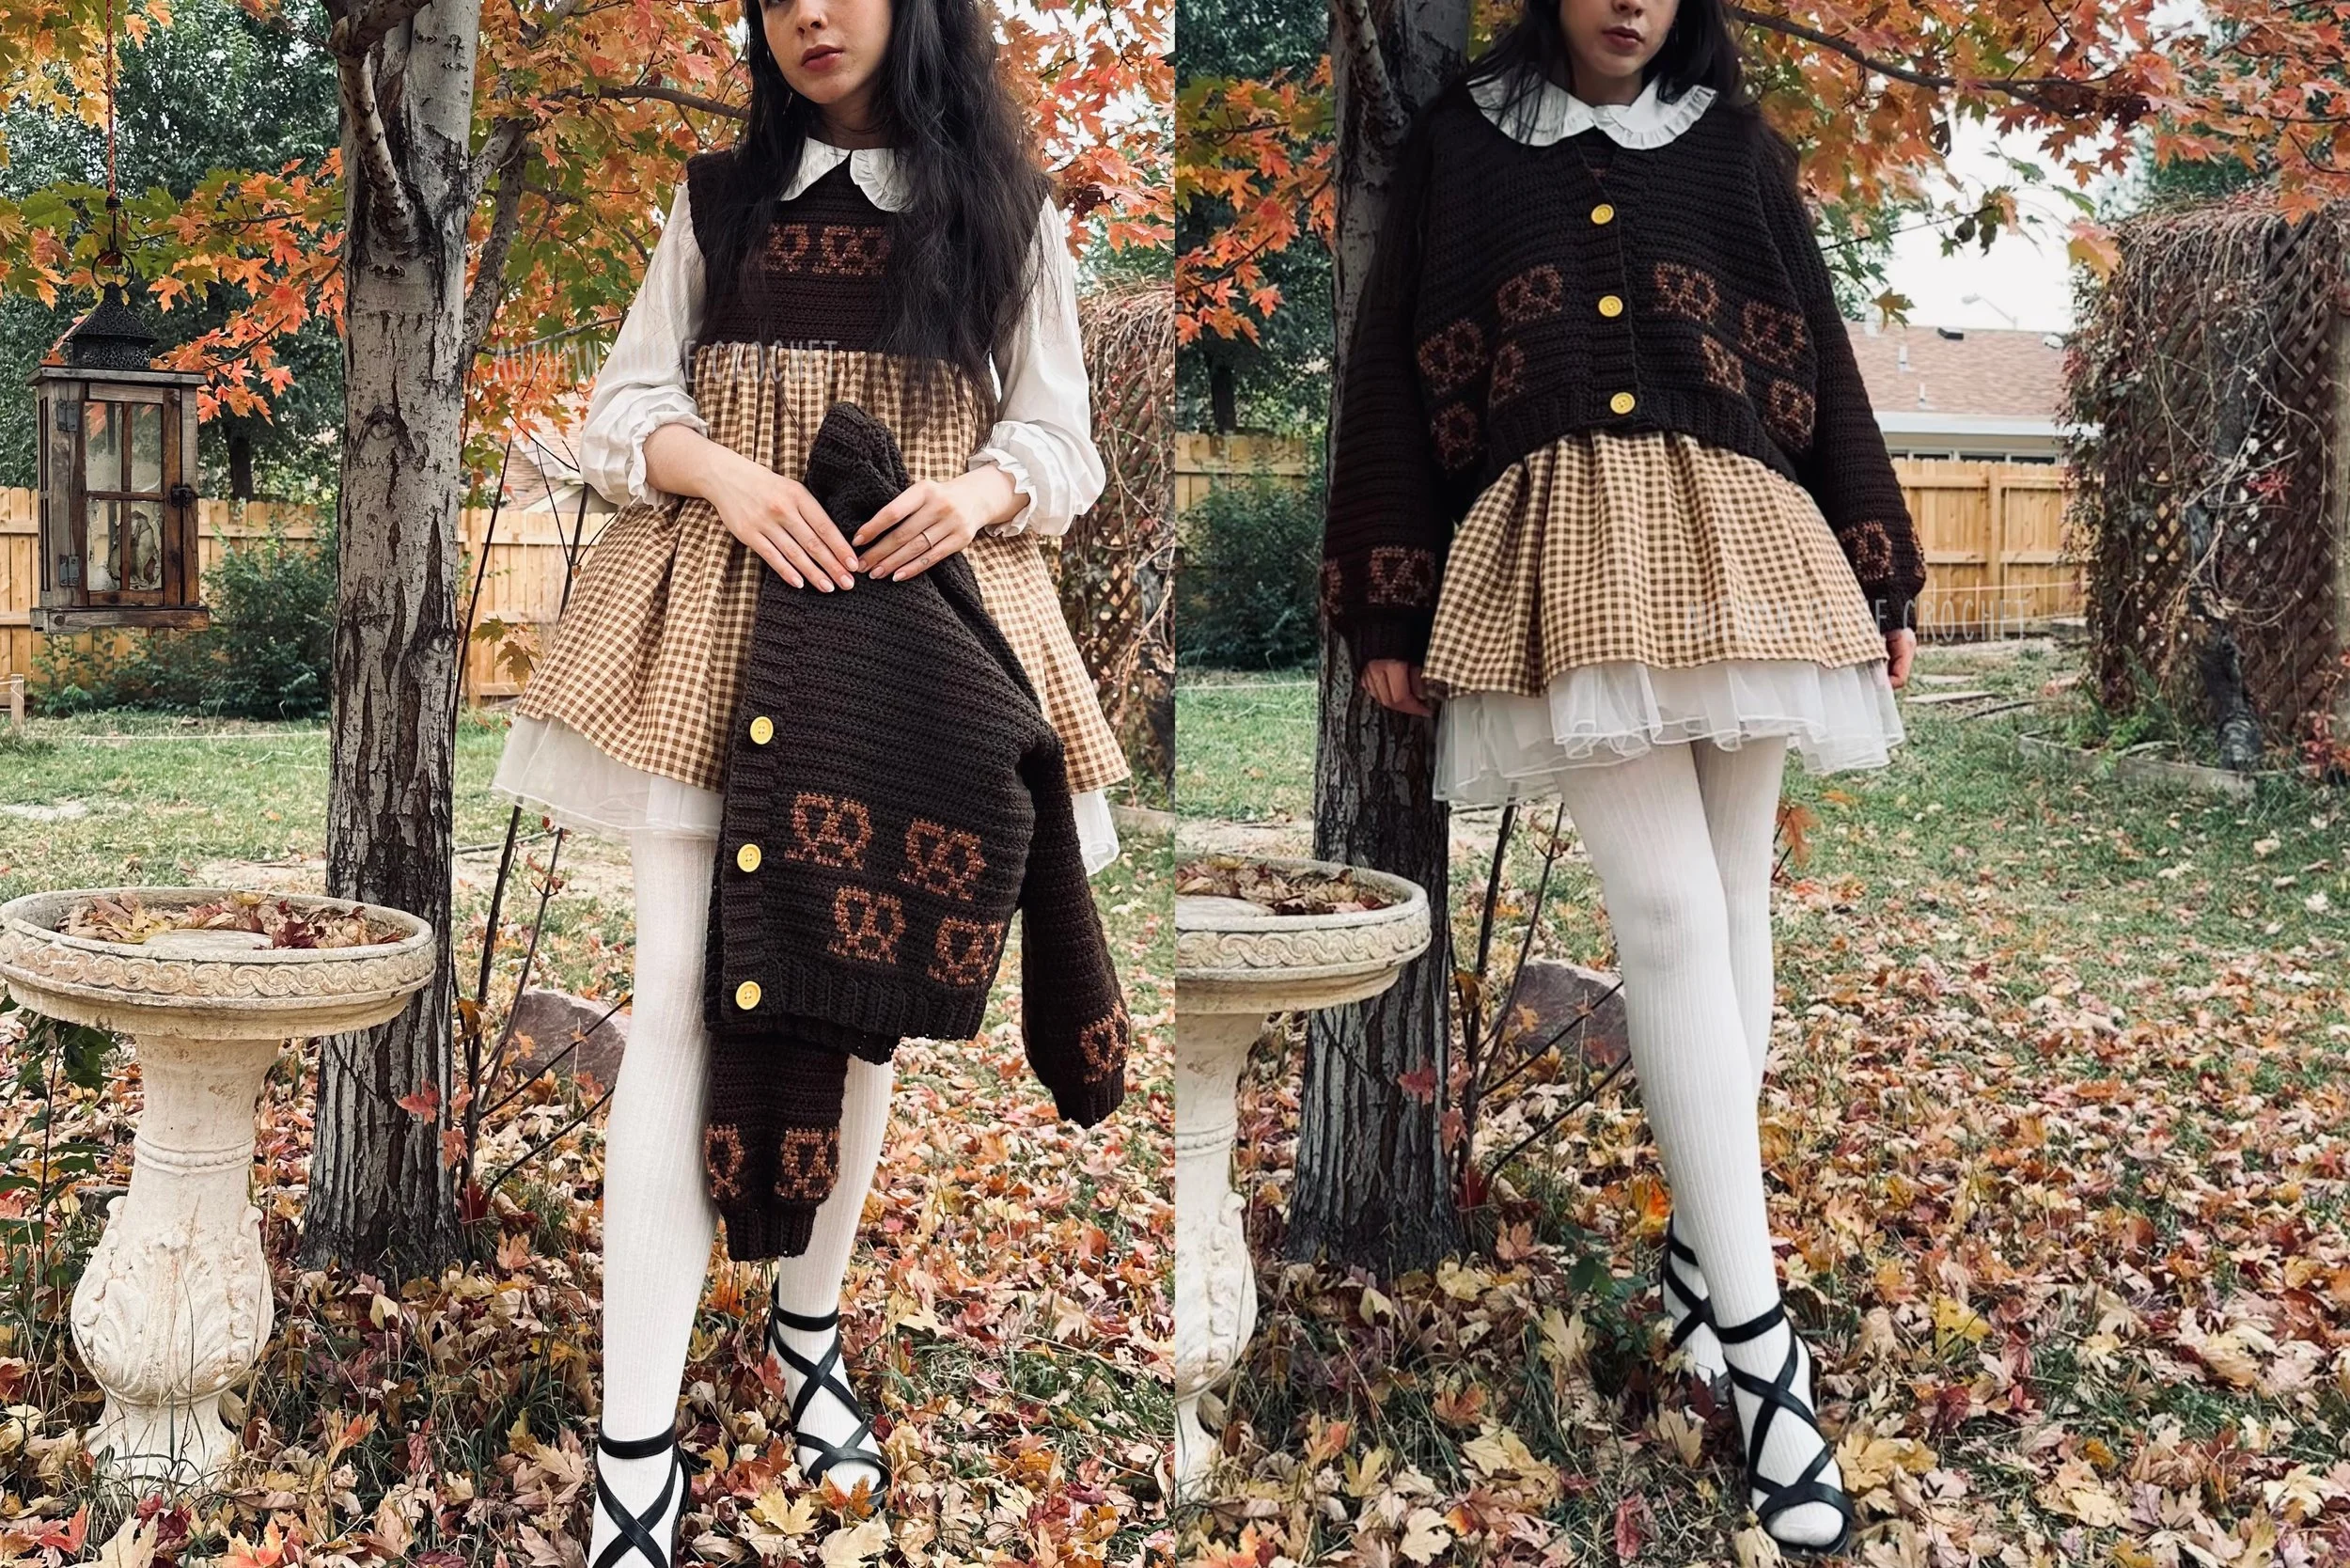
autumn olive crochet babydoll dress ♡
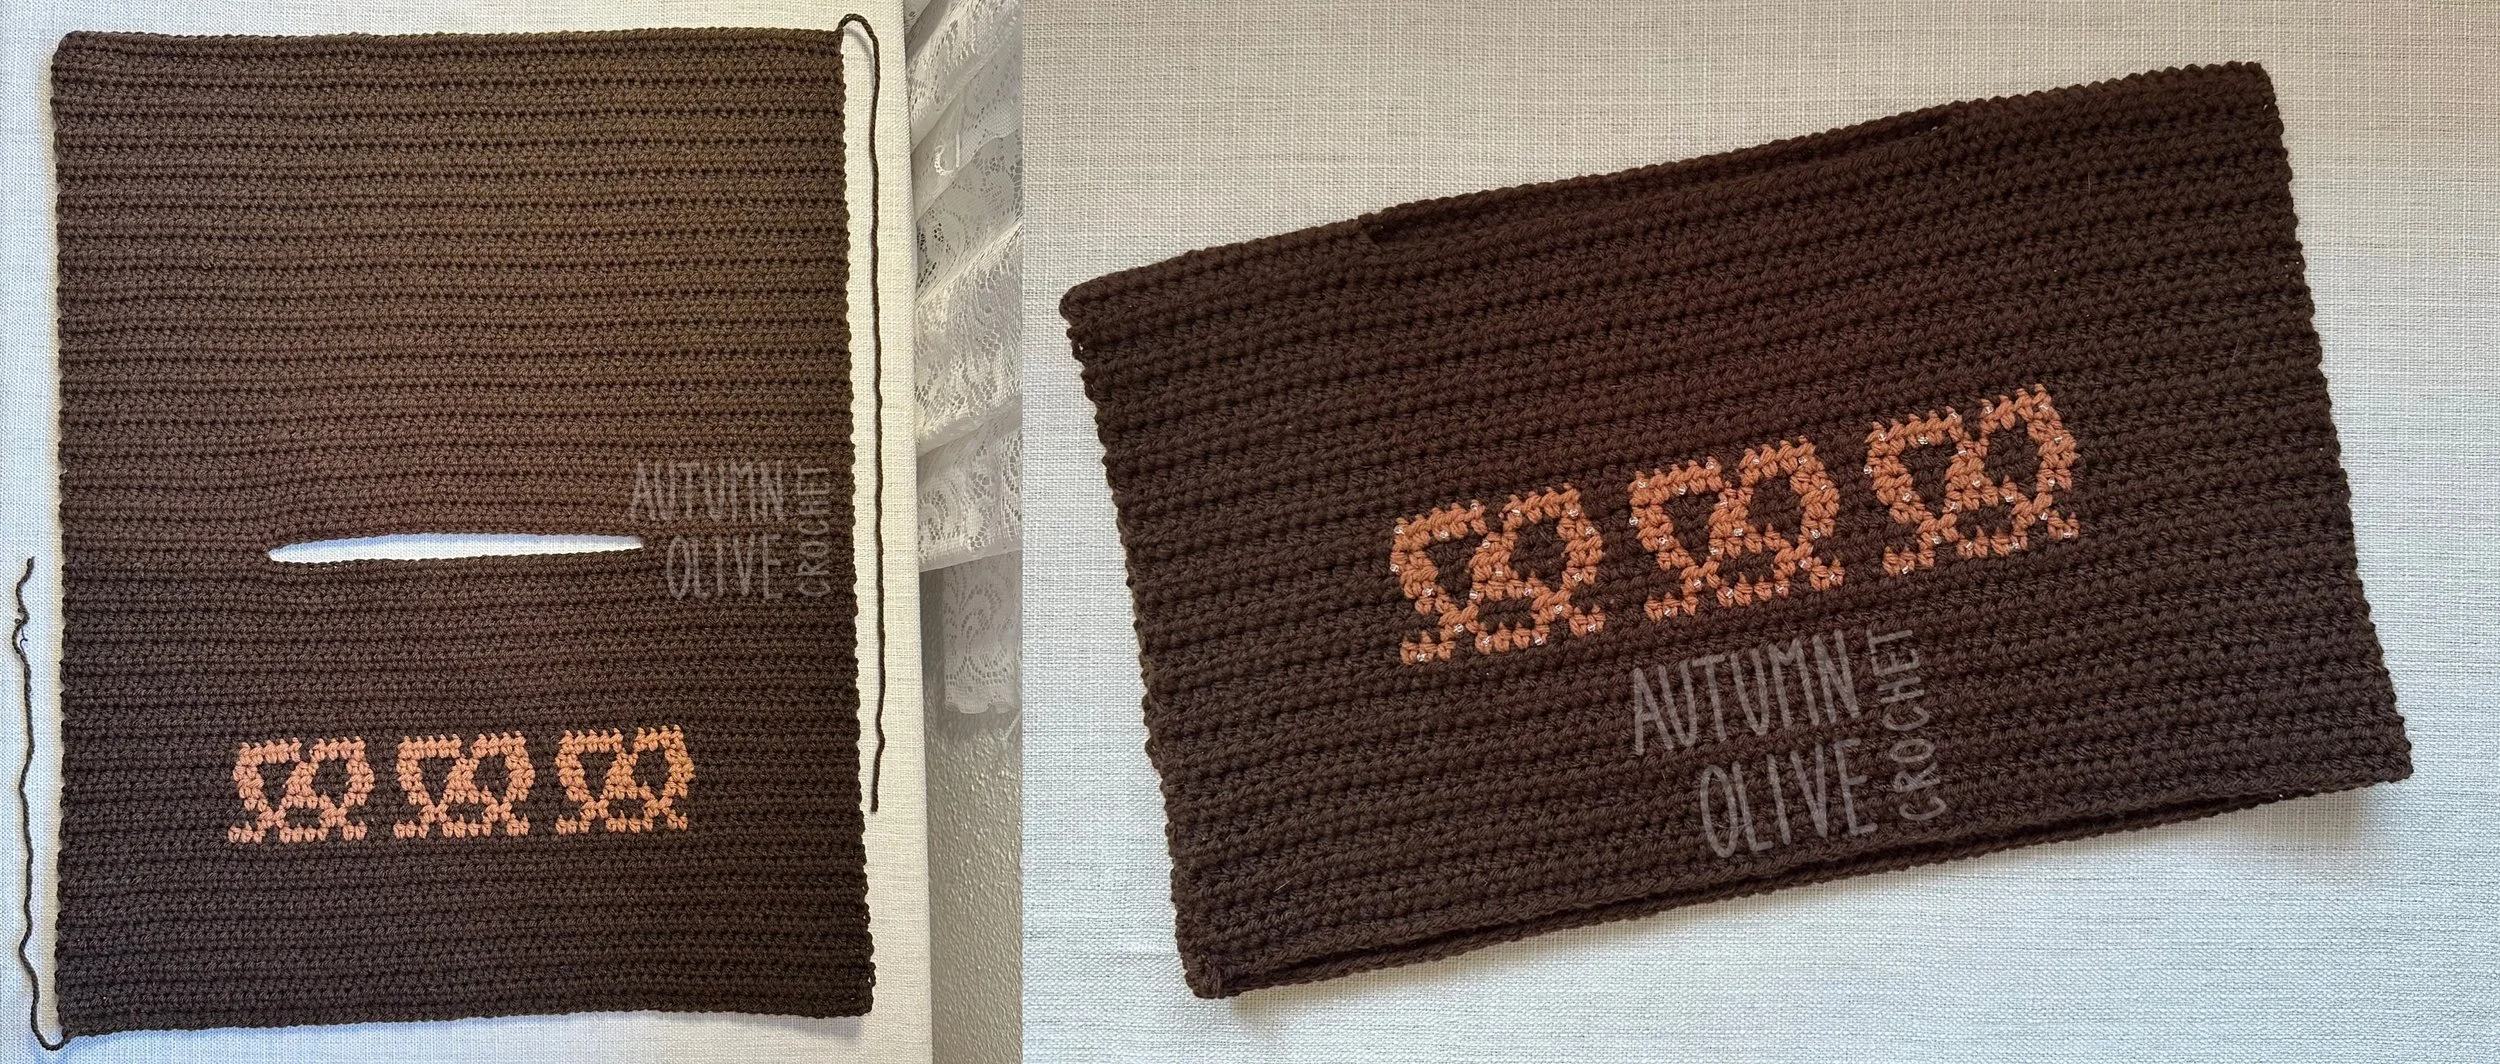
pretzel graphic from my carnival cardigans pattern
♡ an autumn olive crochet original design - by autumn olivia ward
♡ beginner level dress skirt with pockets (my first sewing project)
♡ half-double-crochet bodice works with my colorwork designs
please do not copy or redistribute any part of this pattern, including instructions & images, digitally or physically
you may sell items made using this pattern!! please credit me as the designer in your listings and include the link to this pattern
YOUTUBE TUTORIAL: https://youtu.be/uGB9HnGIRjA
enjoy the pattern without ads for just $3.33 — including color coded sizing XS-5X, blank colorwork graphs for each size, video walkthrough, sleeve options & printable pocket pattern
INFO ♡
written in US standard terms — the top is made entirely of half double crochet — this is a versatile, made-to-measure, size inclusive pattern!
this sewing guide is made for beginners, by a beginner! I have almost 15 years of crochet experience but at the time of writing this, less than a year of sewing experience! please keep that in mind as you sew and be sure to consult the manual for your machine and search the internet for any sewing issues that aren’t addressed here!
@autumnolivecrochet on all socials; autumn.olive.rose@gmail.com
please contact me with any questions or concerns ♡
TAKE MEASUREMENTS ♡
bodice circumference: around the widest part of the chest, plus 4 inches (needs enough ease to pull on and off)
bodice width: half bodice circumference
bodice length: top of shoulder to the widest part of the chest or as desired
sleeve opening: around the upper arm, plus 4 inches
skirt length: from the widest part of chest to desired length, plus 2 inches
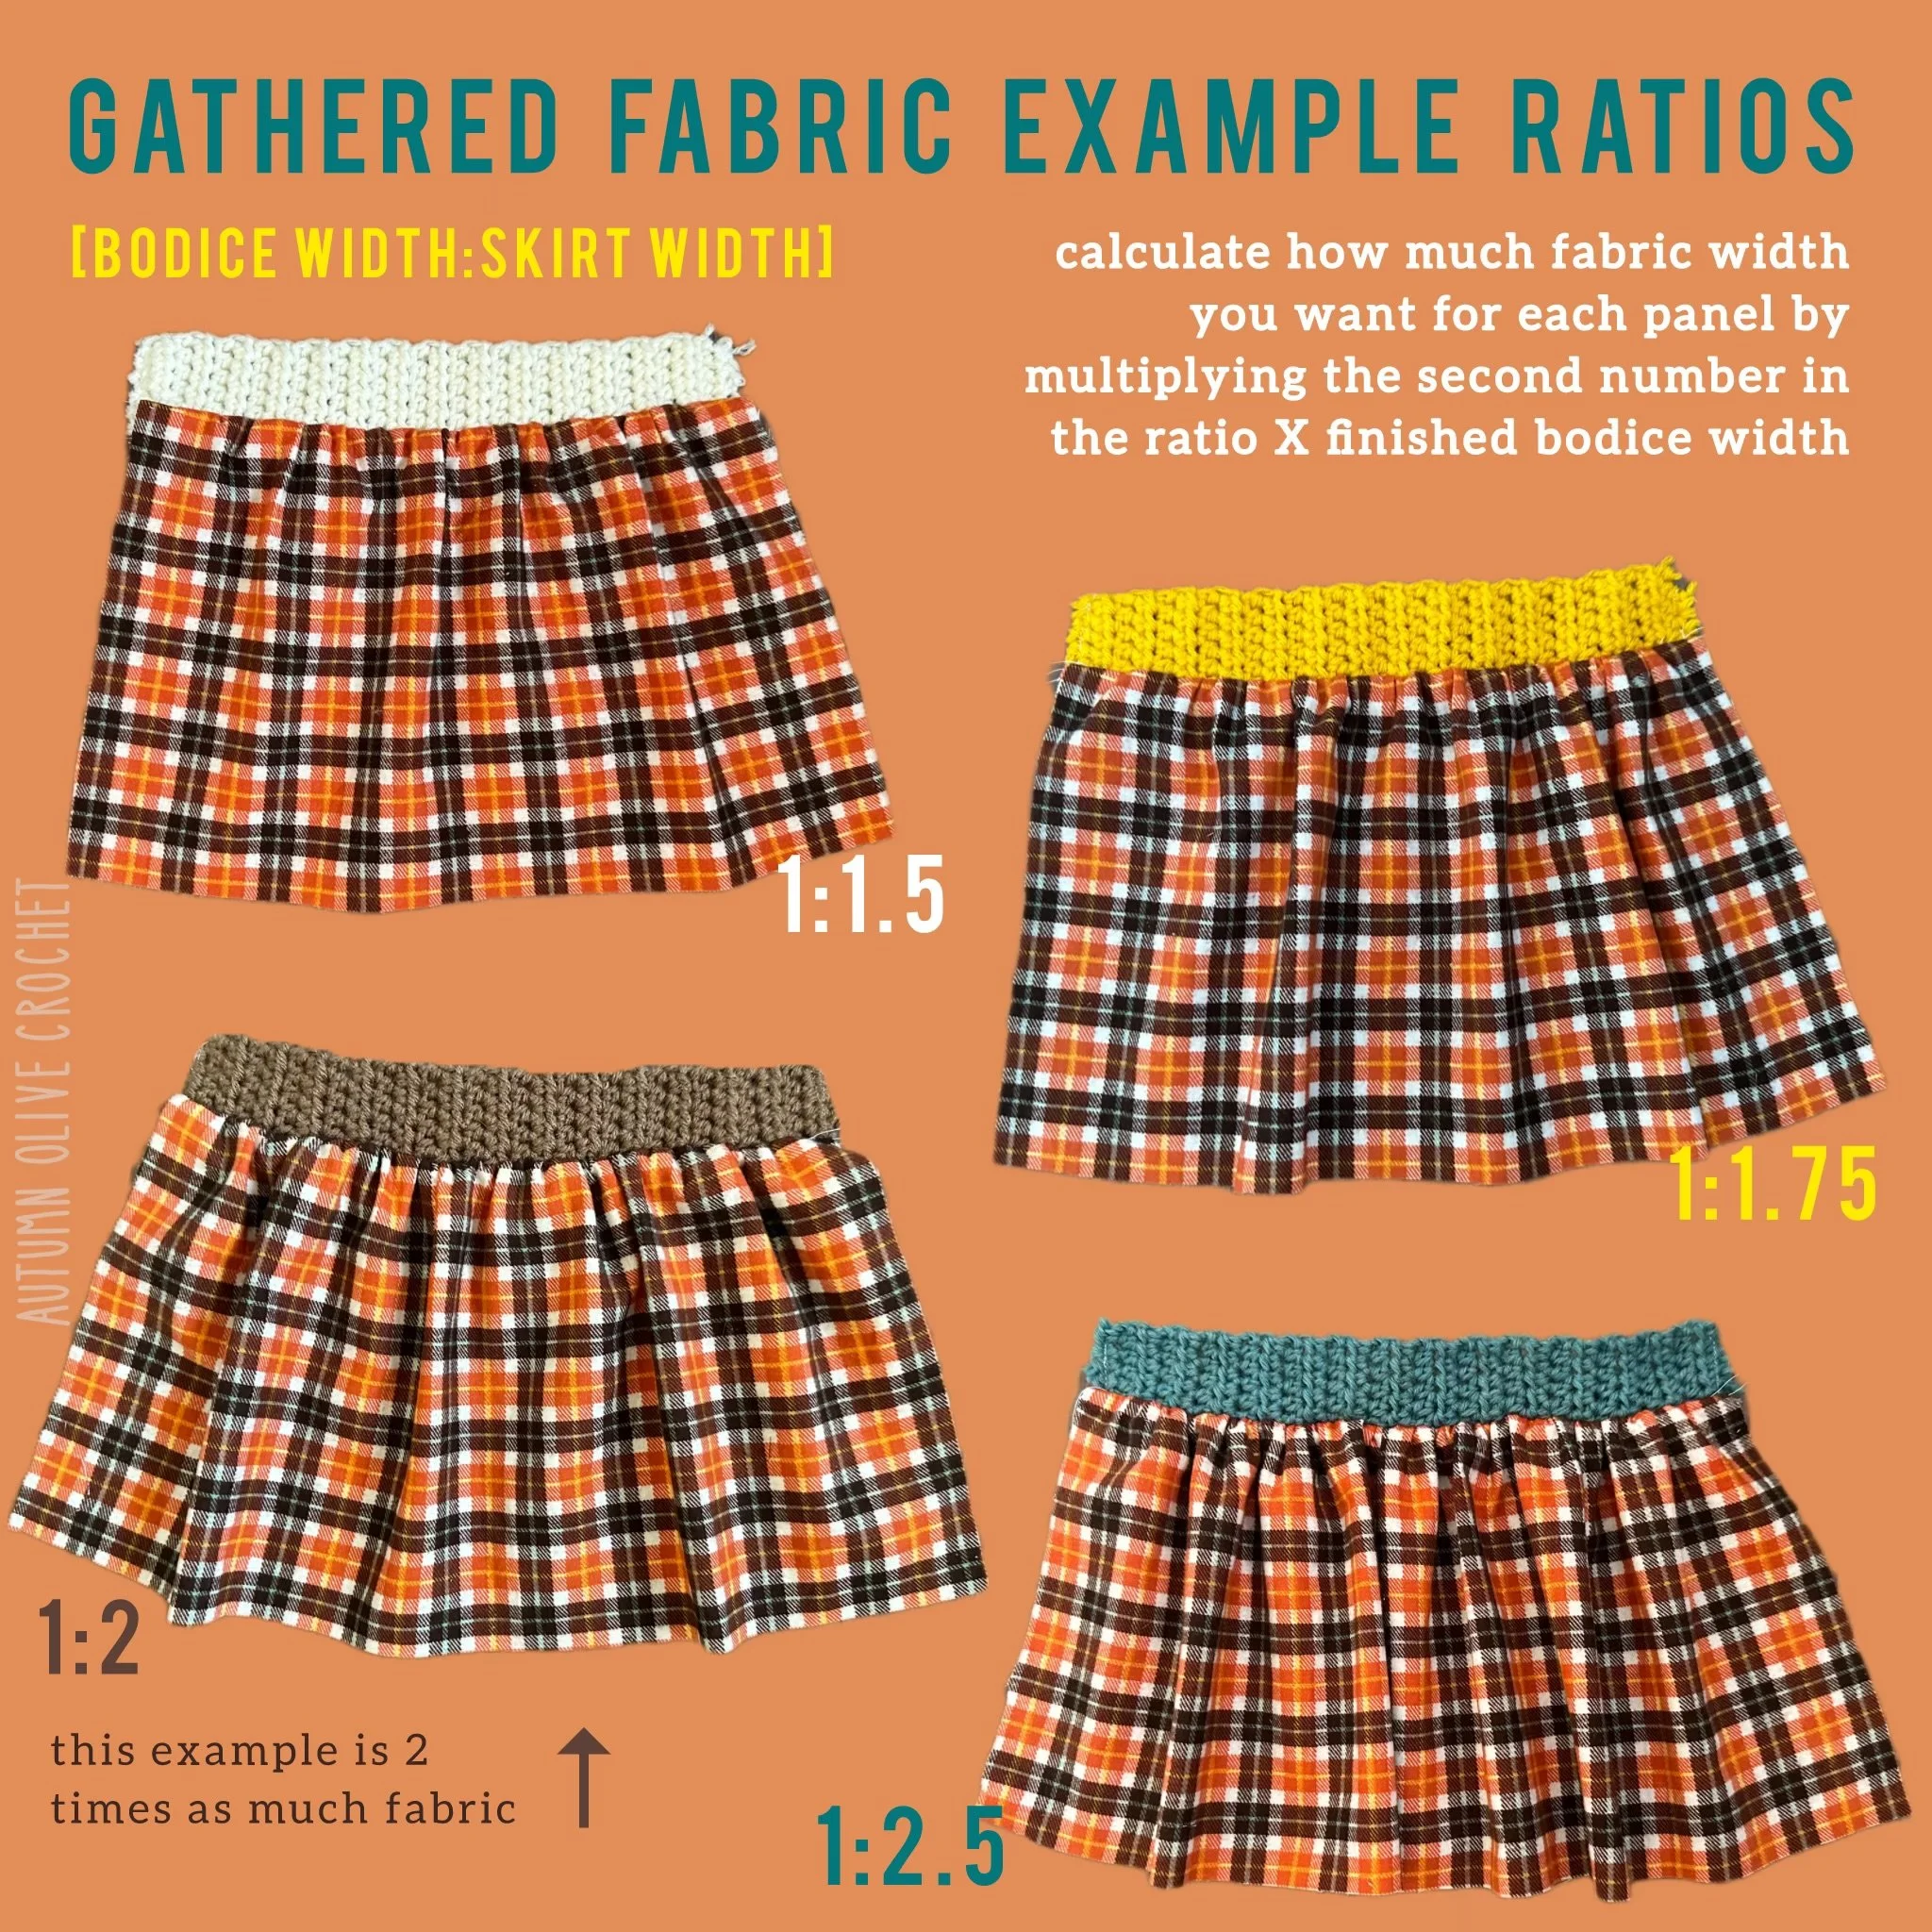
skirt width: width of each skirt panel before gathering, plus 1 inch; see gathered ratio examples to decide
MATERIALS ♡
for my example pieces which are 38” around on top, I use about 400 yards – 225g of sugar n’ cream cotton yarn or 180g of red heart super saver acrylic yarn
I wouldn’t recommend using a lighter yarn unless you are using a particularly lightweight fabric as the top could stretch down
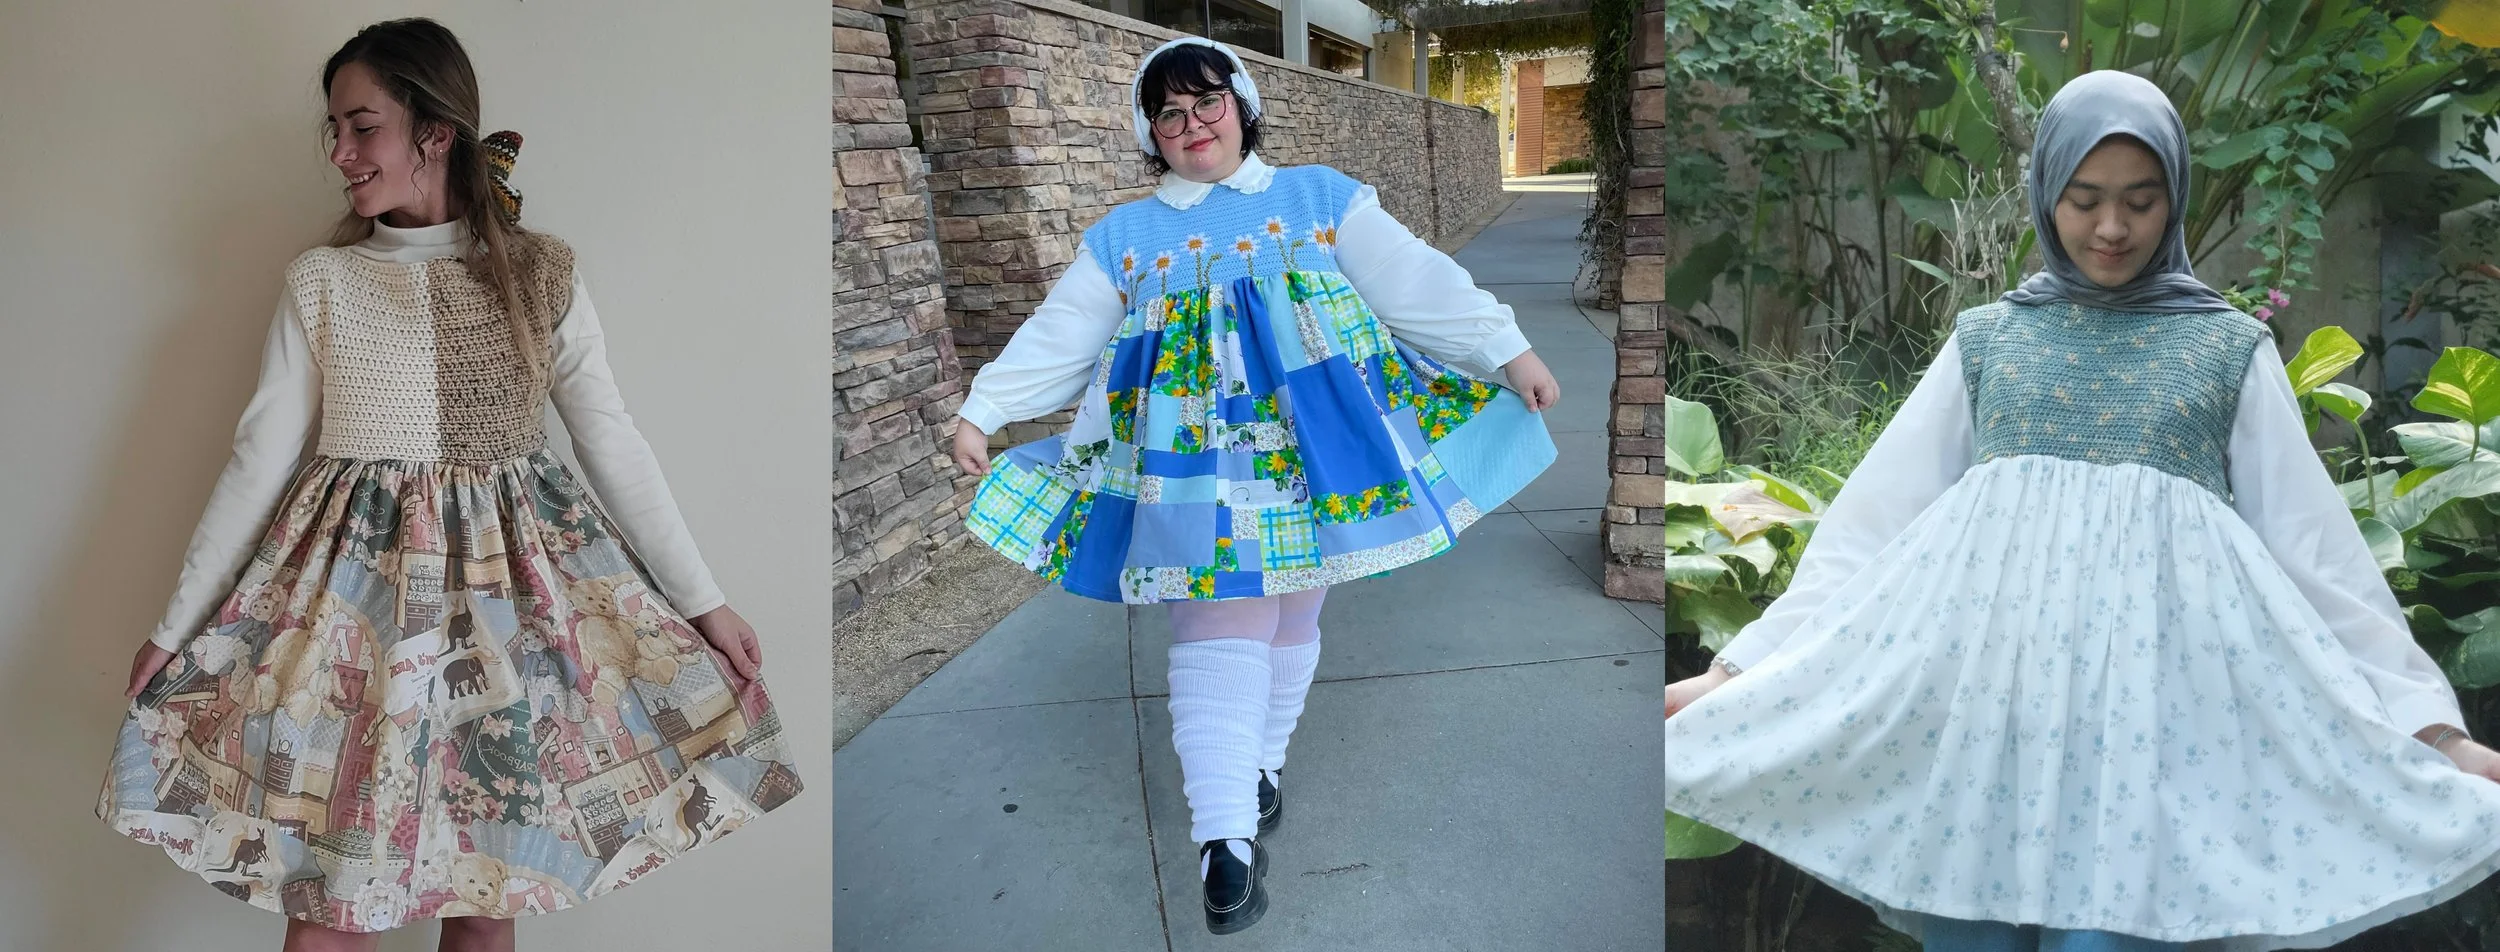
[feel free to experiment with any type of top: old T-shirt, bralette, crochet tank top or one strap top, halter tops like my holly or abracadabra free patterns, granny squares, cat quilt squares, or fun stitches such as lemon peel]
any soft/drapey fabric (around 2 yards; enough to cut 2 panels & 4 pockets)
cotton is the easiest material to work with; be sure to wash it first in case it shrinks!
most of the material I’ve been using for these dresses has been store bought cotton fabric or thrifted polyster/cotton/flannel bed sheets, curtains, etc. you could even use a skirt or dress that is already made if you want to go the easy way!
for my example bodice pieces which are 19” wide, I cut 22”x44” for each fabric panel, giving me a mid-thigh length and a gathered skirt about 2.3 times wider than the bodice
IDEA: if you only have enough of one fabric for the panels, don’t be afraid to use another piece of fabric for the pockets, it blends in well and adds a cute effect!
IDEA: if you have extra skirt fabric, you could find a mock collar pattern to make and wear under your dress
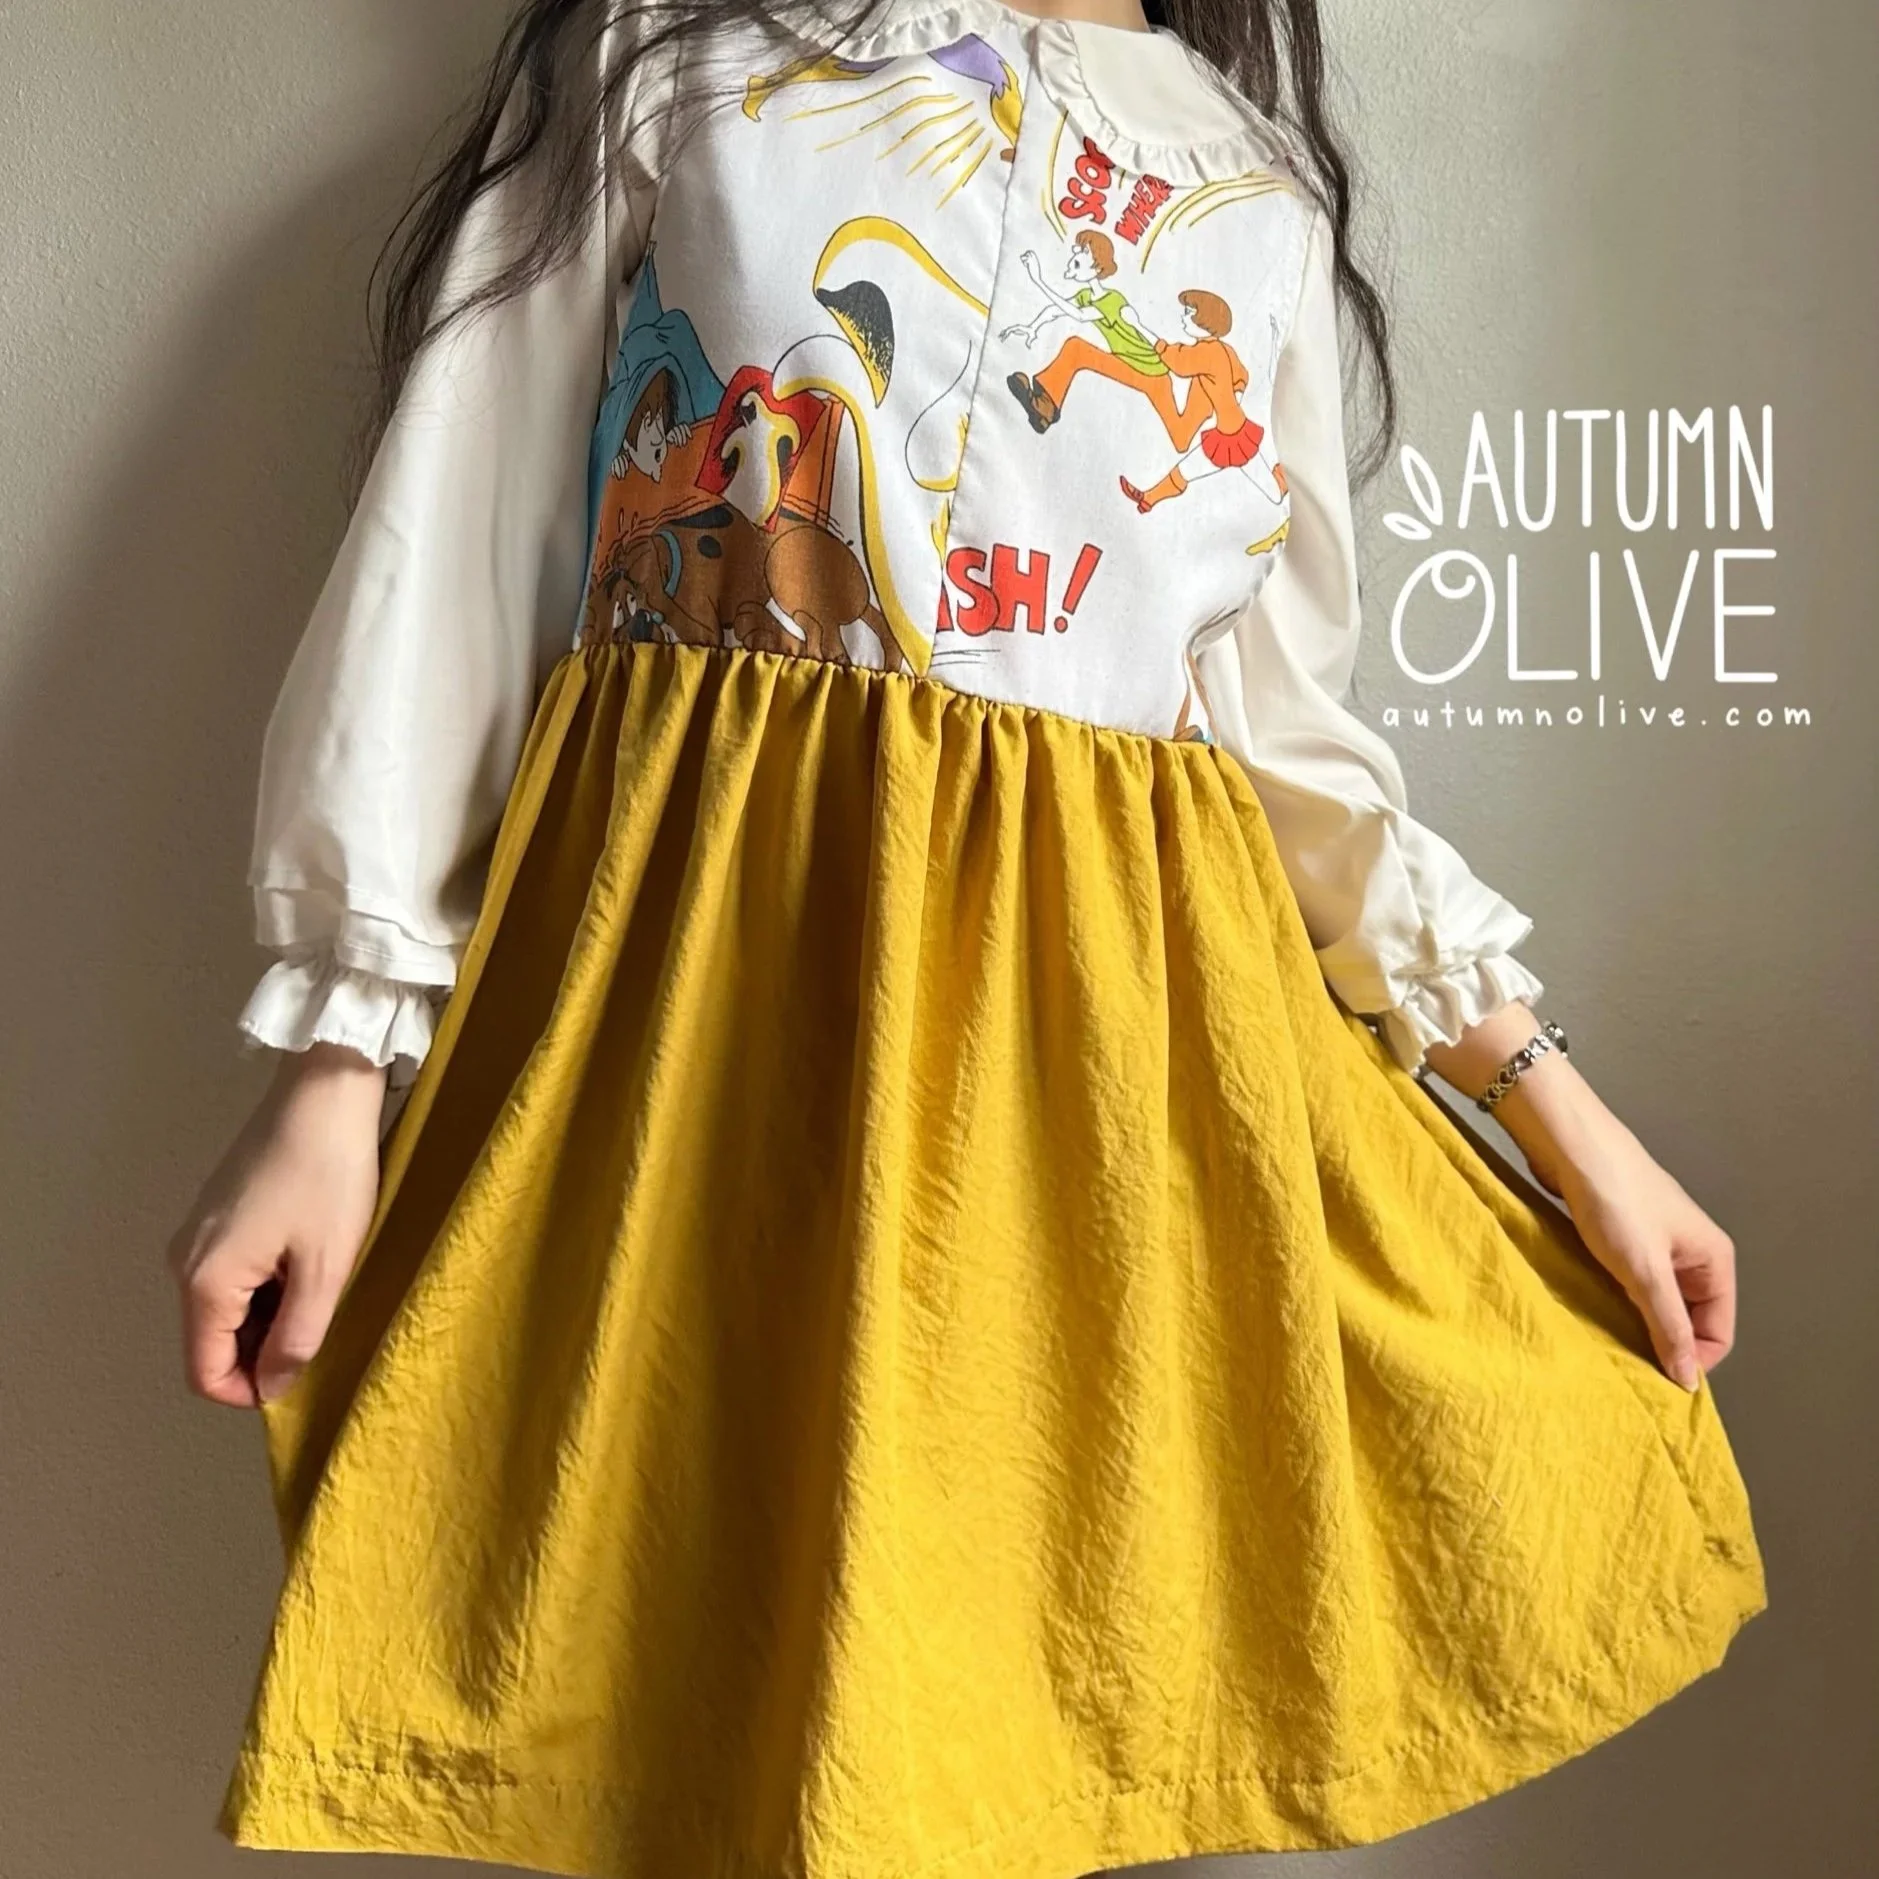
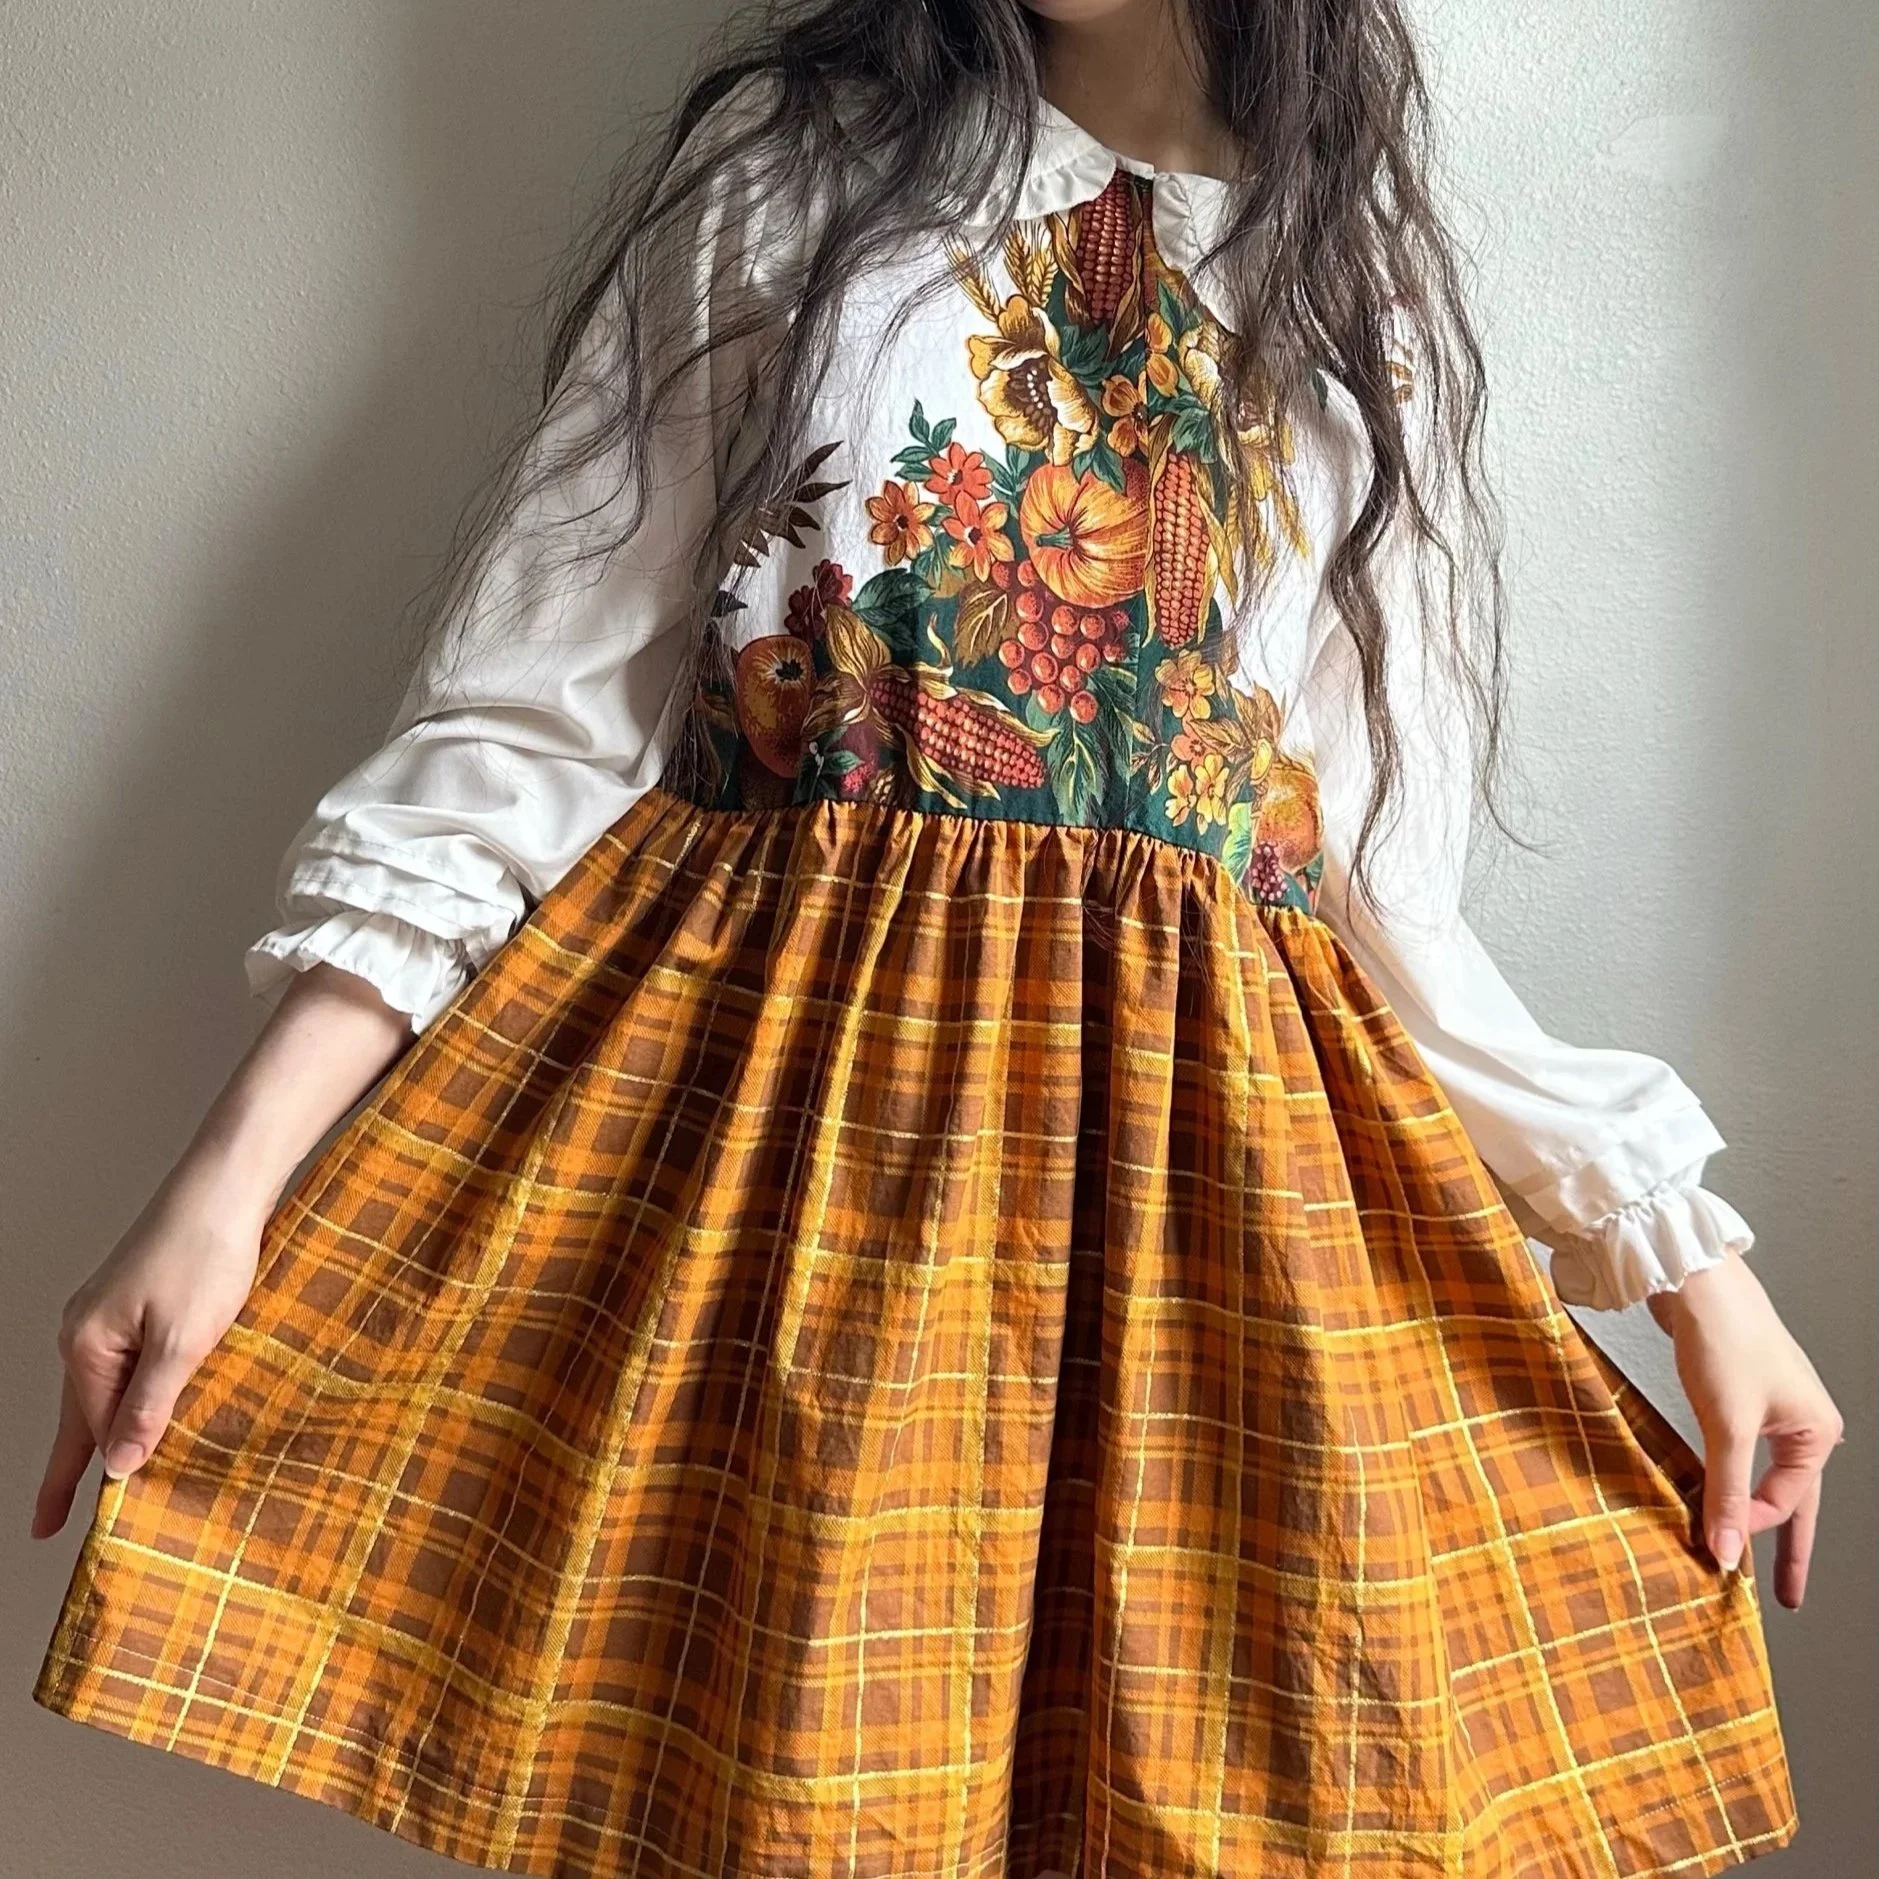
see additional dress examples in the tester gallery
CHECK GAUGE ♡
6 rows of 7 HDC = 2” x 2”
if not, try adjusting your tension or hook size, this piece should be somewhat stretchy but not too loose & holey
COLORWORK NOTES ♡
any graphics you put on the back panel area need to be worked upside down
my colorwork instructions:
autumnolive.com/my-colorwork-instructions
discounted colorwork add-ons that can be used for the top:
♡ CROCHET THE BODICE ♡
the boxy style top seems wide but it should shape up when worn and the top corners will extend over the shoulder slightly
leave a long starting tail in order to seam up the left side
if you are incorporating any hdc graphics from my free or paid patterns, be sure to start them on odd rows only and study the colorwork instructions with them for tips on how to follow the graphs, center the image, and adjust for lefthandedness
FOR THE FRONT — make a chain as long as needed to reach half of your top circumference; chain 1 turning chain (turning chains do not count as stitches)
example – I want 38” around or 19” across & my gauge is 7 stitches per 2 inches so: ( 19” x 7 stitches ) / 2” = 66.5 (aka 66 or 67 stitches, I’ll choose 66)
tip: you can add or subtract a starting chain and work with an odd number of stitches to make it easier to center an odd numbered graphic
ROW 2: hdc across the chain; I would have 66 hdc at this point; chain 1, turn
ROW 3: hdc across; chain 1, turn
repeat row 3 for the entire front of the panel, for as many rows as needed to reach your top length measurement; do not fasten off
I prefer to do about 4 extra rows on the back so that the neckline sits a little lower in the front, but you can adjust the number of rows on the front and back — just make sure they are both an even number of rows
example – I want 10.6” length & my gauge is 6 rows per 2 inches so: ( 10.6” x 6 rows ) / 2” = (rounded) 32 rows per panel or 30 on the front & 34 on the back
NECKLINE — (this row counts as the first row on the back panel) if I have 30 rows of 66 stitches, I would work 16 hdc for the first shoulder, chain 34, skip 34 stitches, then finish the other shoulder with the remaining 16 hdc — keep the neck opening at least 34 stitches wide so it will be easy to pull over
note: if you changed to an odd number of stitches, make that adjustment to the neckline chain & skipped stitches count
FOR THE BACK — (working the second row of the back panel) continue working the same number of stitches across the last row and neckline chains, and for the rest of the back; fasten off with a long tail in order to seam the right side
IDEA: add any of the 6 other collar styles from my oversized pullover pattern
SEAMING — fold the bodice inside out and line up the bottom edges; seam with a whipstitch up to the point where you have enough free rows to fit around the upper arm with about 4 inches to spare, so that it is comfortable and so you can layer!
example – I seam 10 rows up each side, leaving 20 free rows on the front and 24 on the back & my gauge is 6 rows per 2 inches so: ( 44 total rows / 6 rows ) x 2” = 14.5” total around
it is a good idea to try on the top now and make sure everything is fitting well; this will also help you double check your desired length of skirt fabric
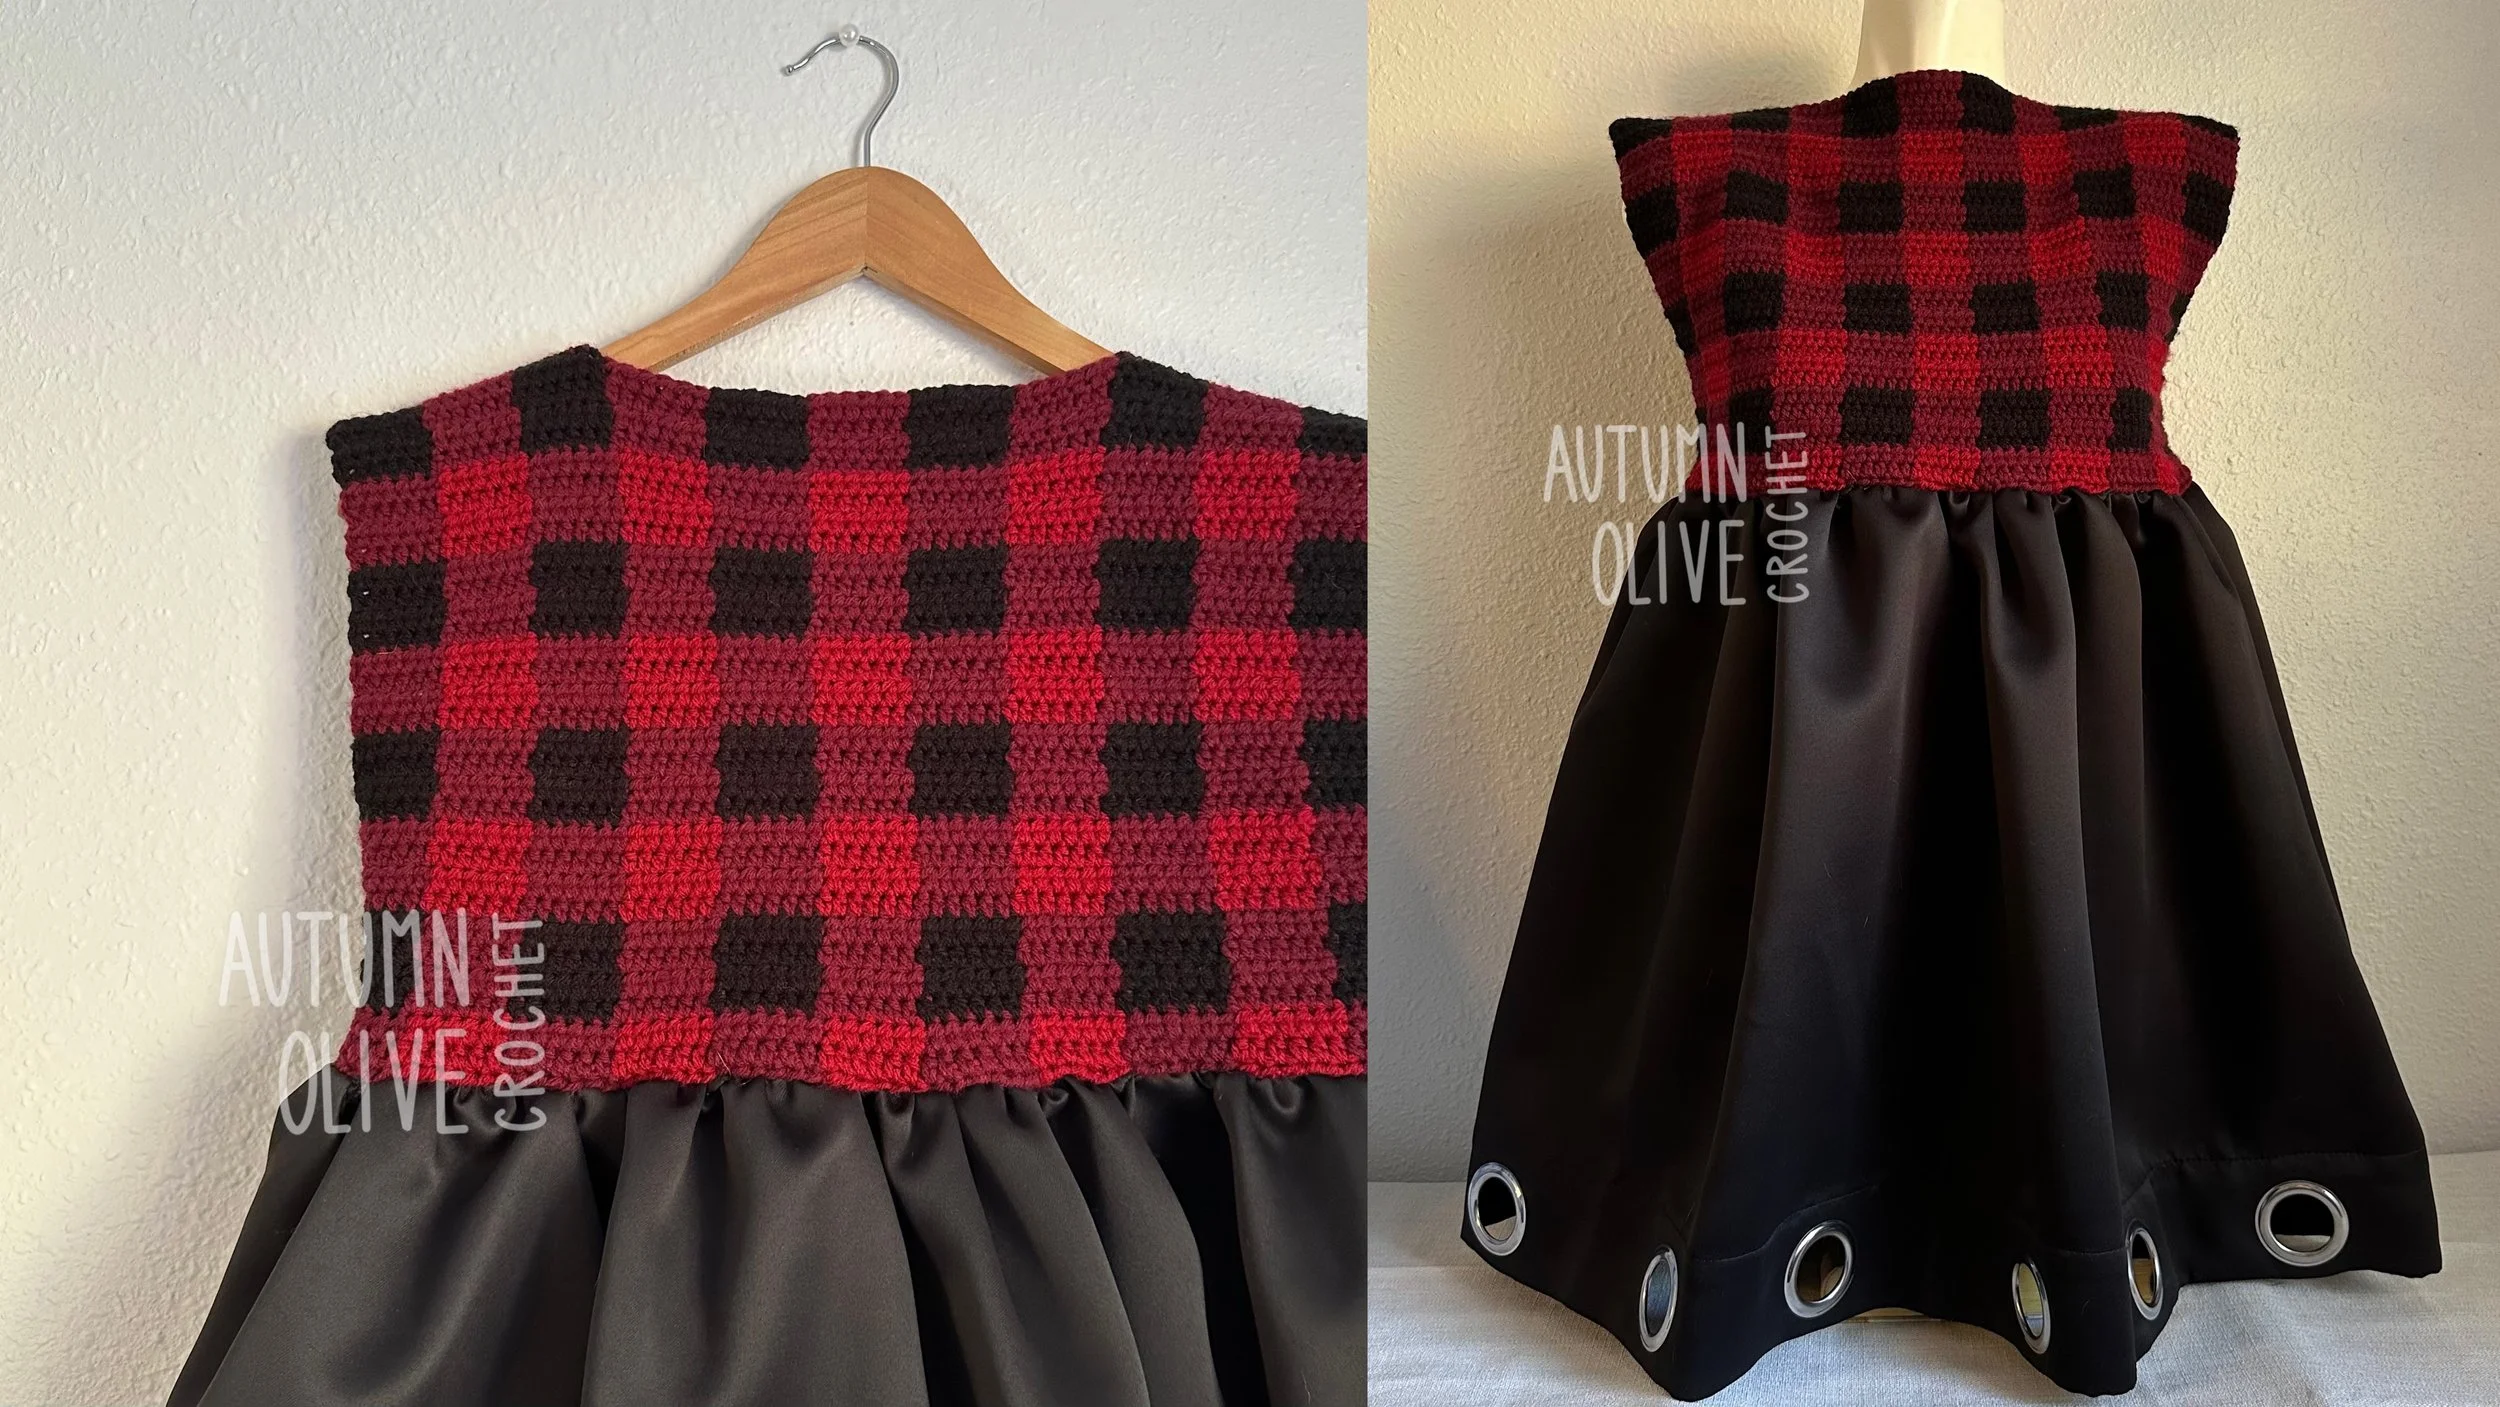
I used blocks of 6 stitches by 4 rows to create this plaid top, and a set of old curtains for the skirt!
♡ SEW THE SKIRT ♡
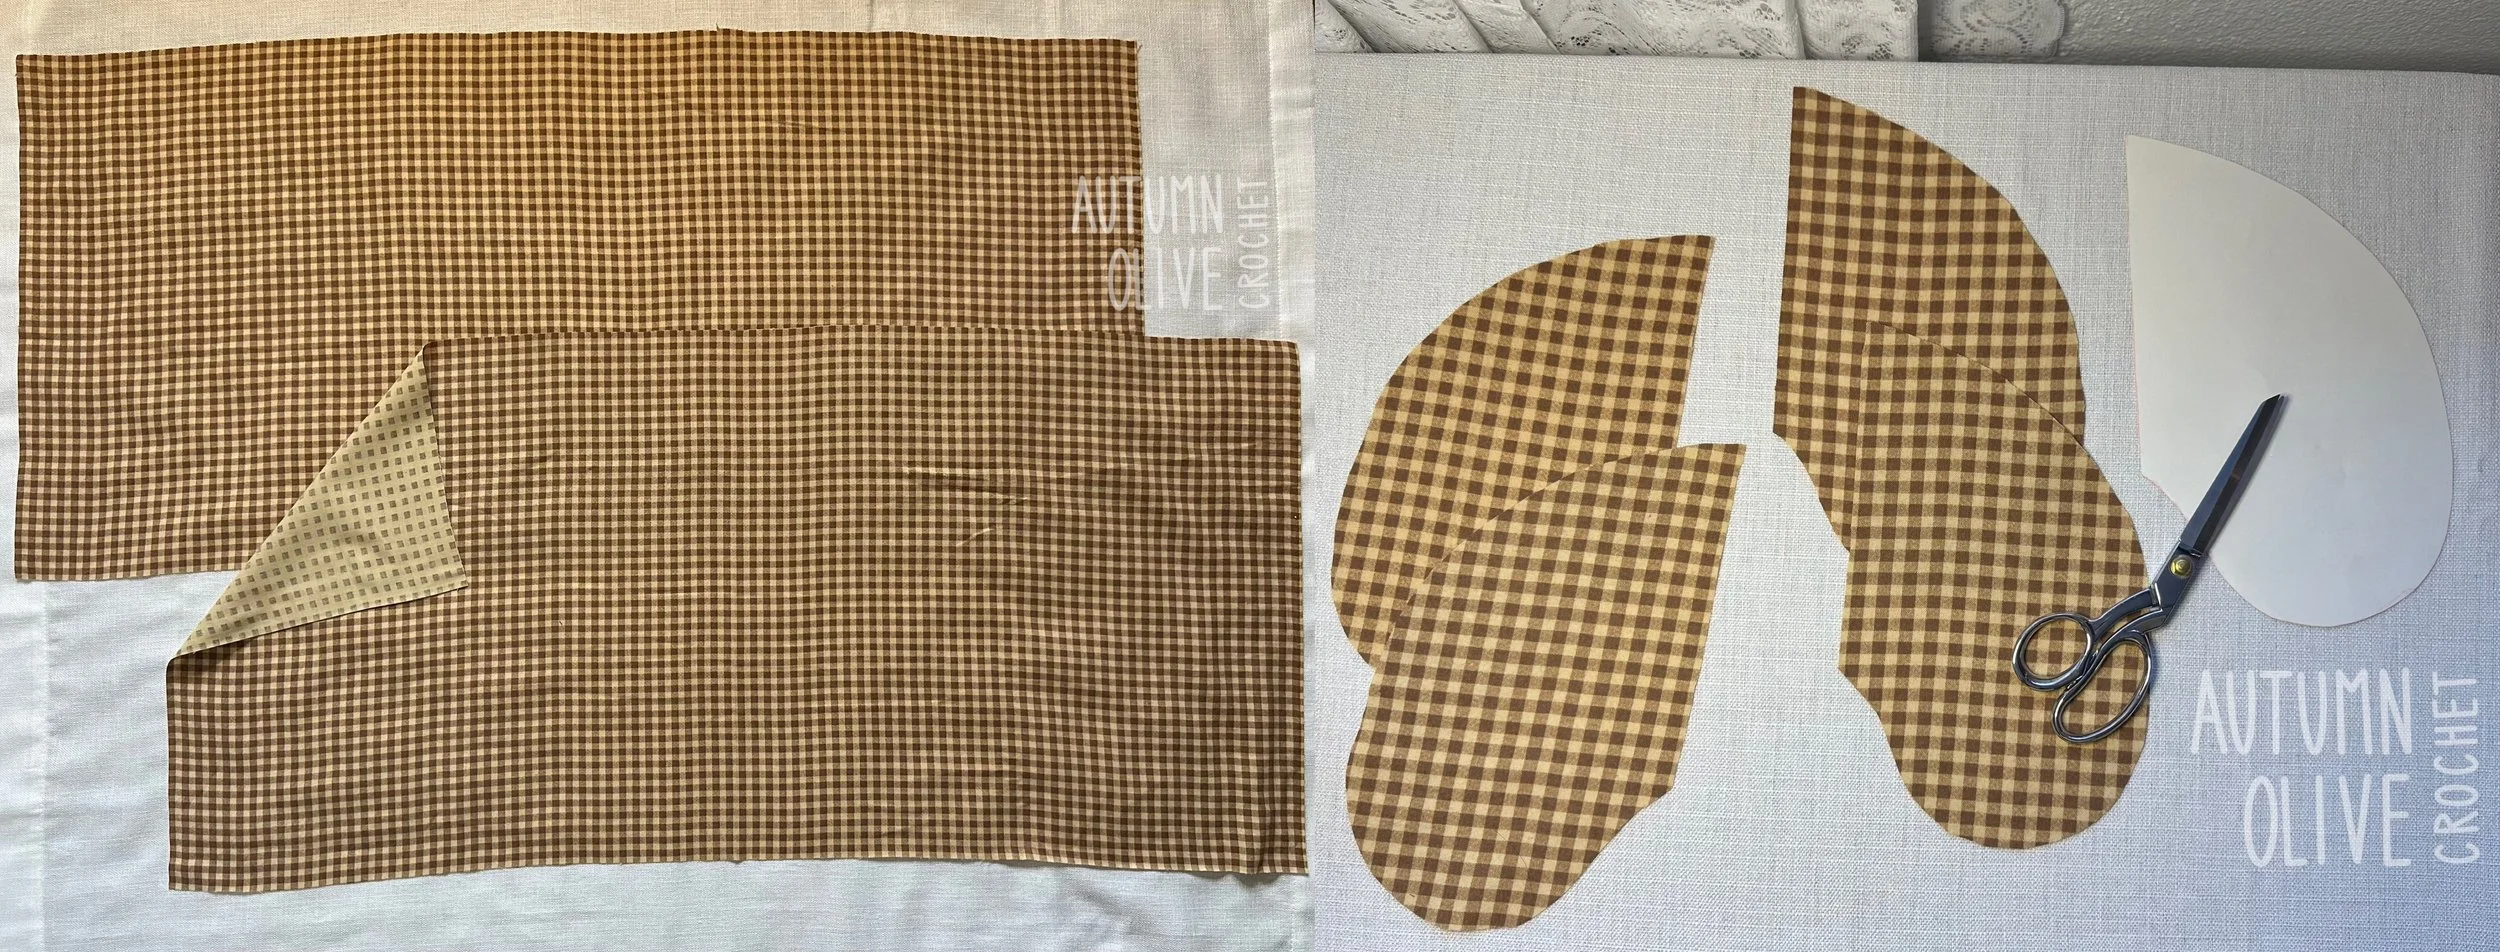
IRON & CUT FABRIC — measure & cut 2 panels of fabric, as wide as desired with about 1 inch each of seam allowance, and as long as desired with about 2 inches of seam allowance
this fabric is 44” wide so I went with that; you can cut 2-3 segments and make vertical seams to create wider panels from narrow pieces of fabric — my panels are 22”L x 44”W each
pin/cut or trace/cut 4 pieces of pocket fabric, 2 right side & 2 wrong side
I used this pattern: https://www.sewstylish.com/2017/02/10/download-free-pocket-pattern/
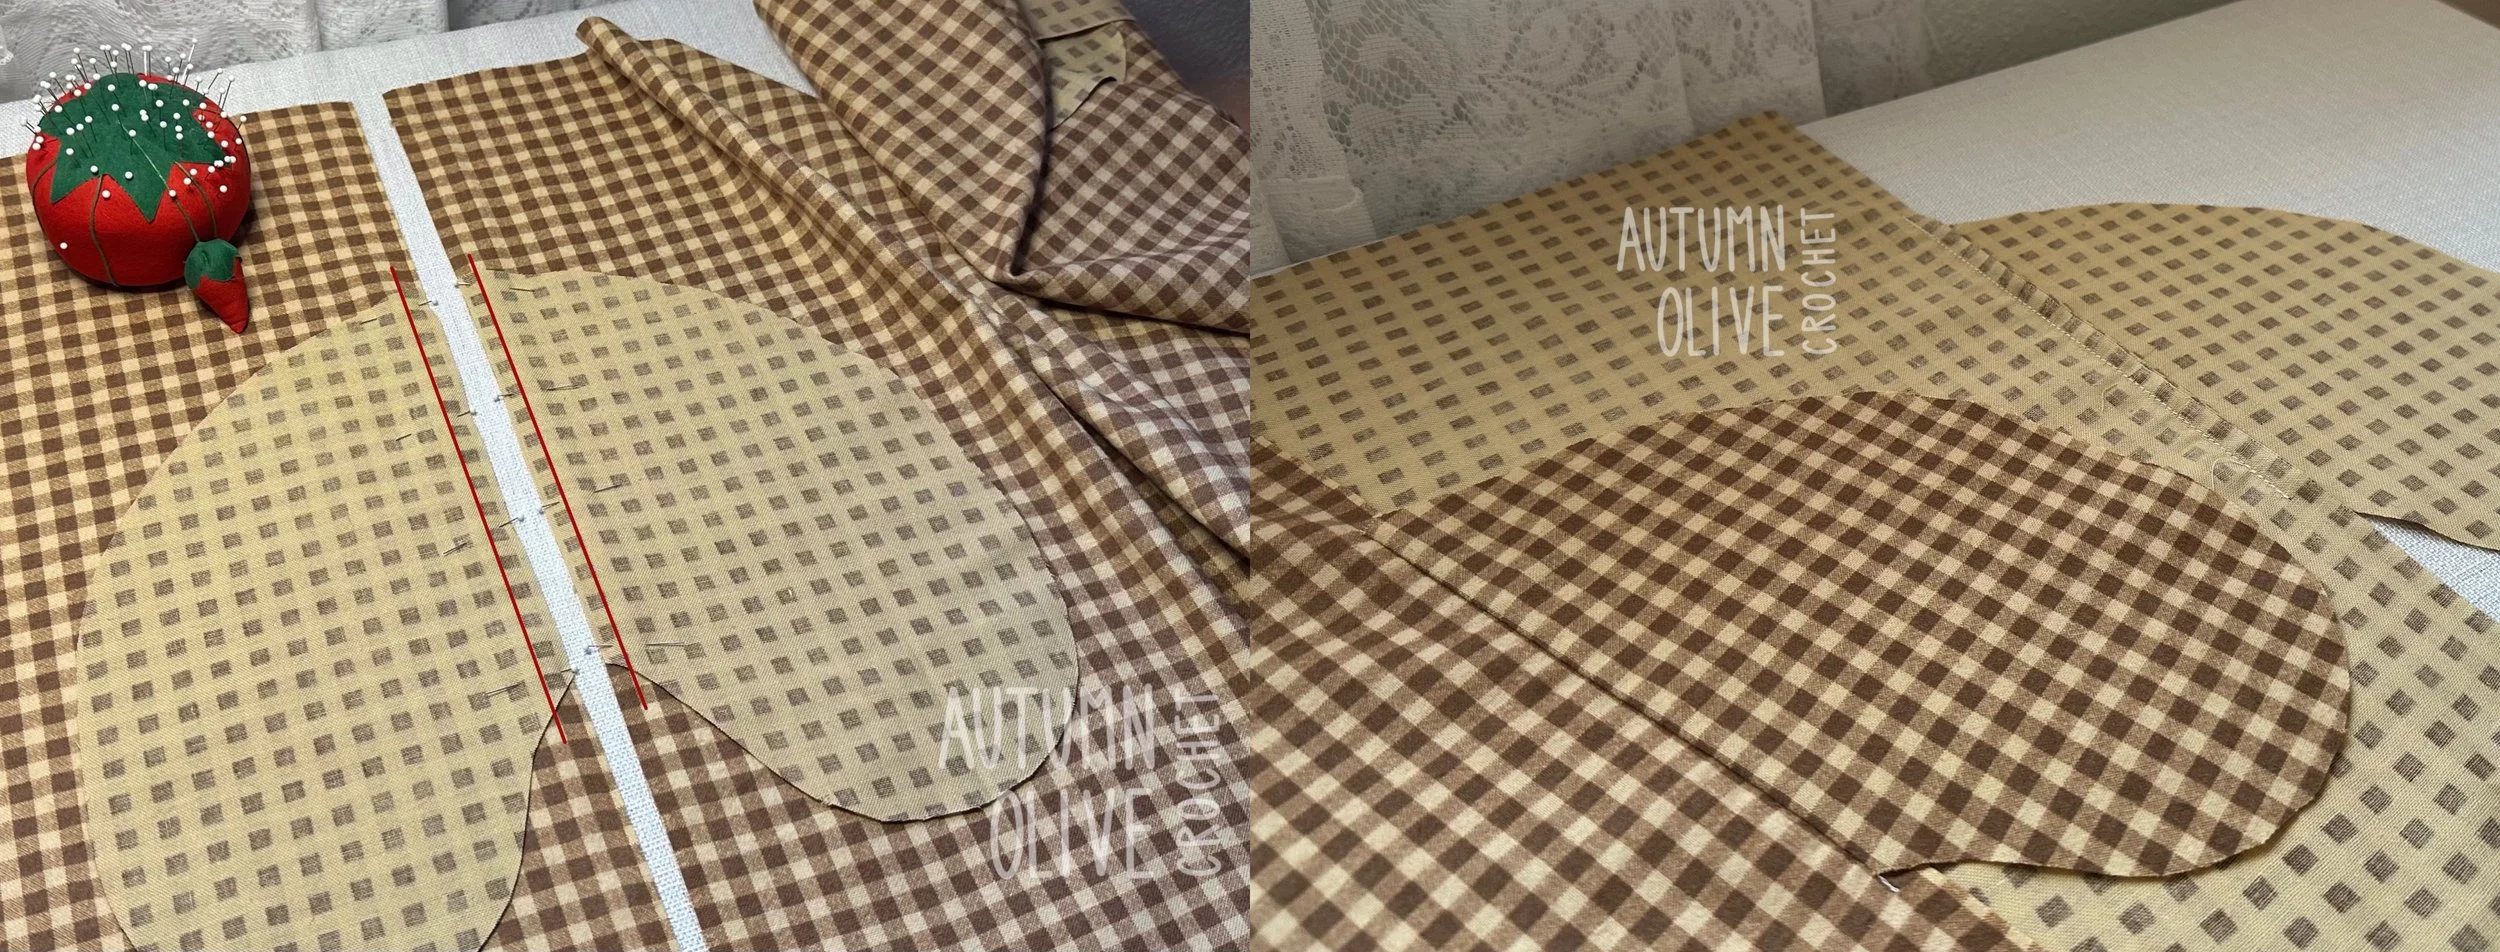
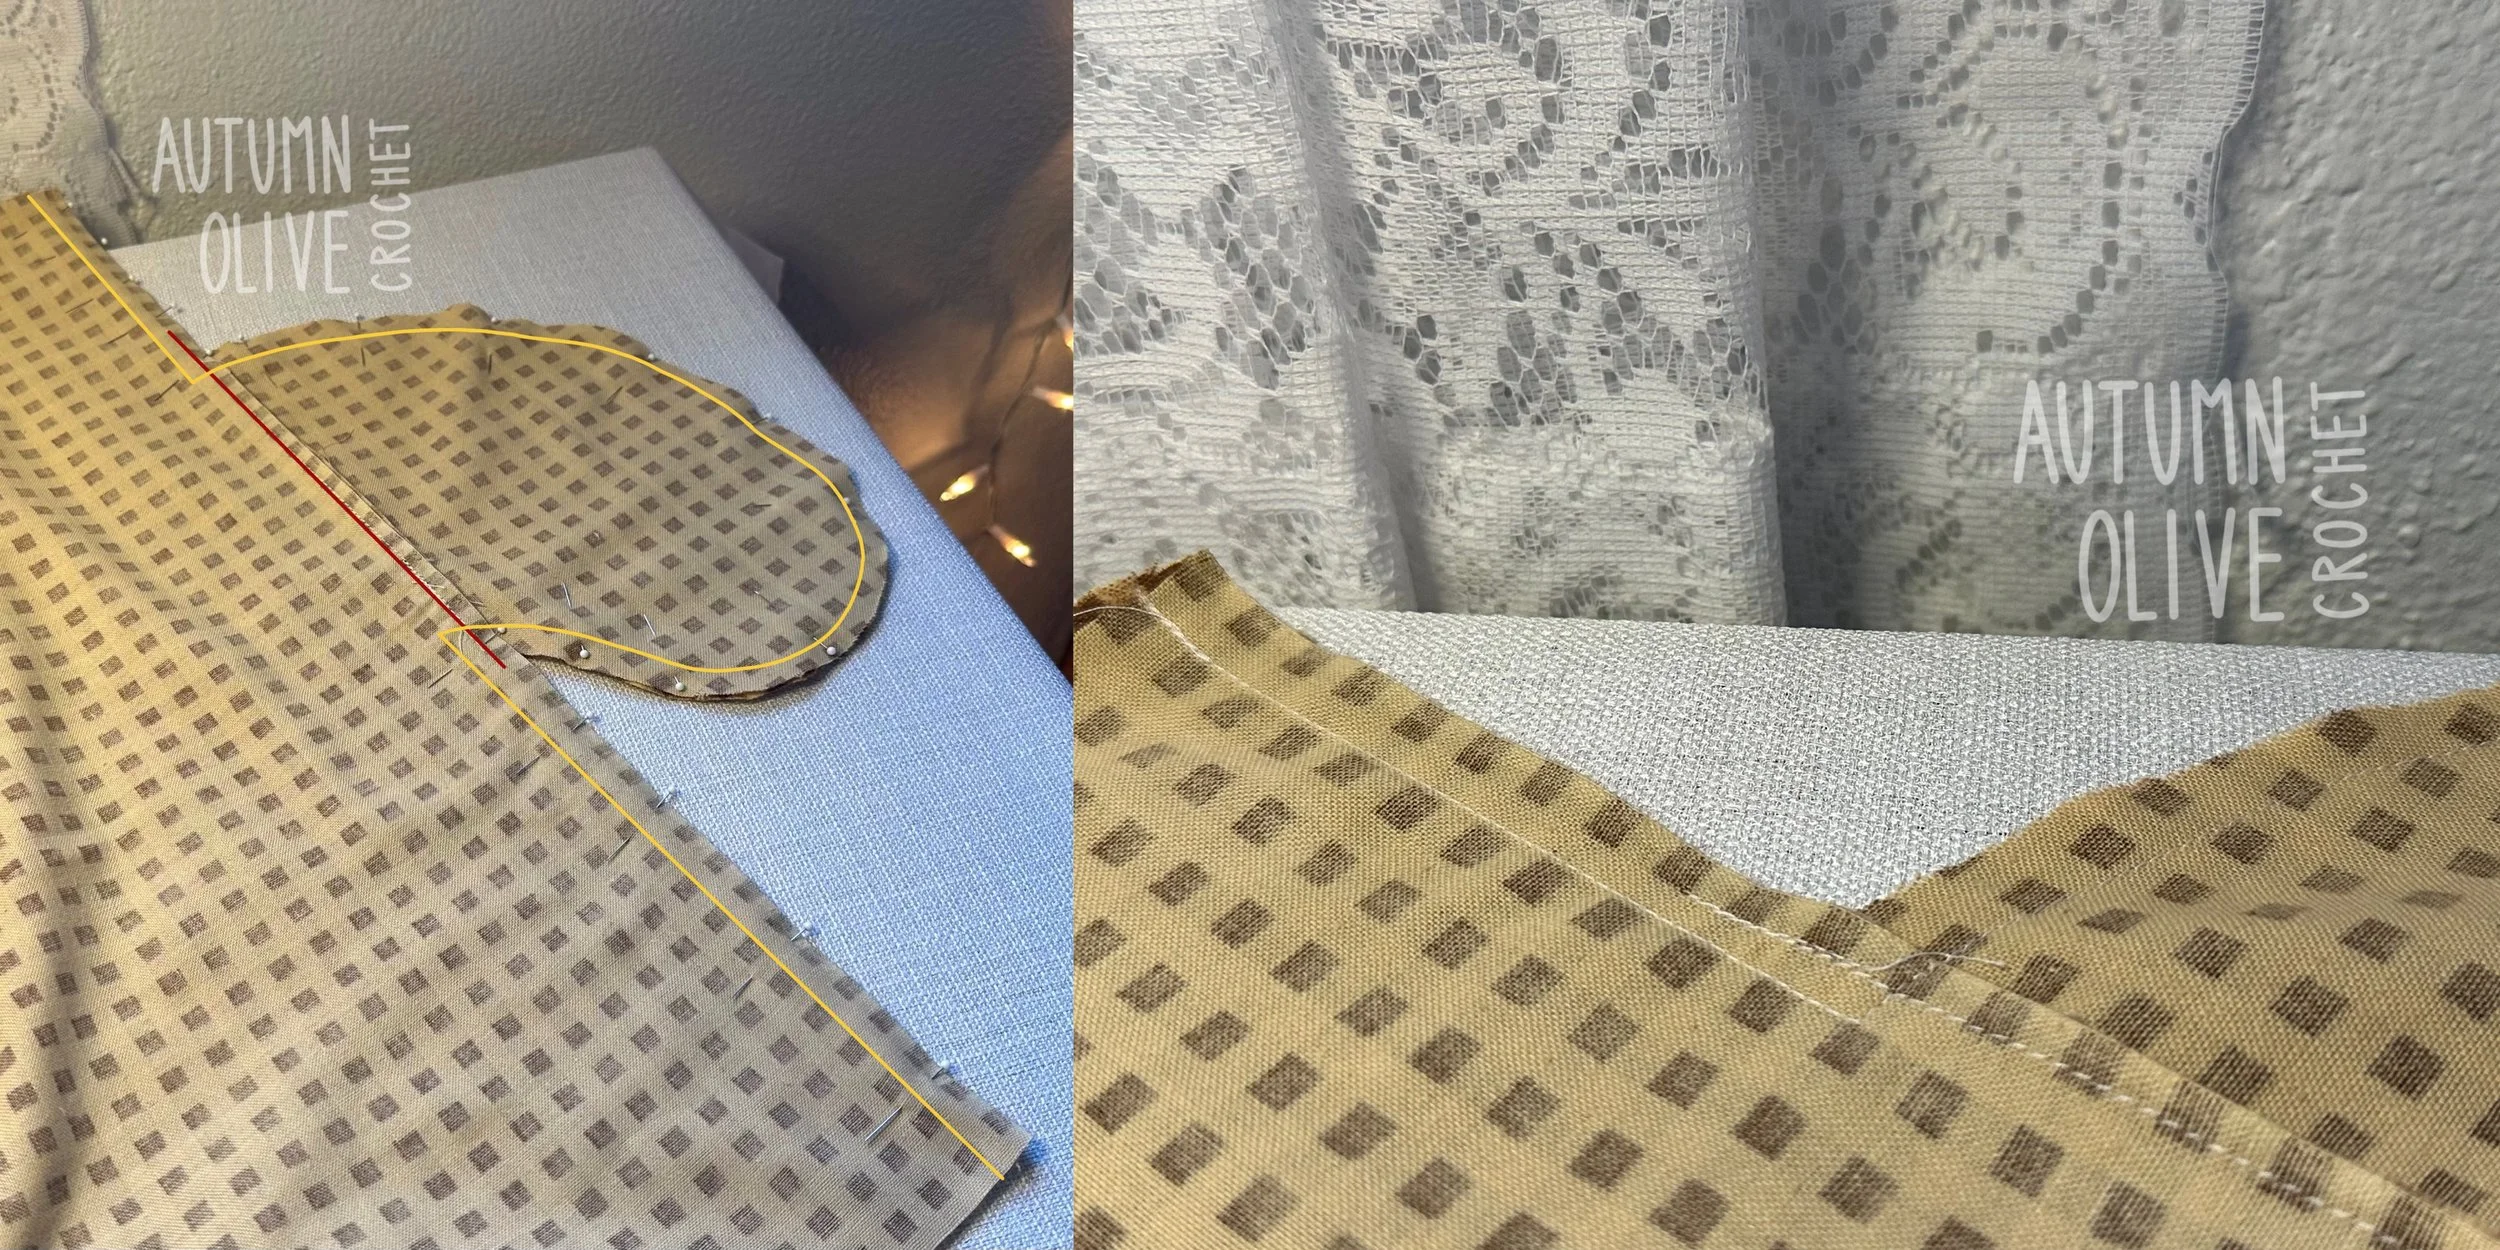
PIN, SEAM, & PRESS POCKETS — pin pockets, right side on right side, edges aligned, about 5 inches below the top of panels
it is good idea to save a scrap piece now and practice your stitch settings on it as all machines and all fabrics are different!
seam the pockets on with a straight stitch (I use length 3 out of 4 on my machine, 0 width) lined up at about ¼” or with the right edge of the presser foot so that it isn’t too far into the fabric, going over the top and bottom edge of the pocket slightly (remember to always backstitch at the beginning and end of a seam!)
press the seams towards the pockets
PIN, SEAM, & PRESS SIDE SEAMS — pin sides and pockets, right side on right side, making sure pocket seams are aligned
seam the sides and around the pocket with a straight stitch, lined up at about ½” so that it is further in than the pocket seam; you can lift the presser foot while your needle is in the fabric to turn your work as you go
turn skirt right side out & press the side seams
FINISH EDGES & GATHER SKIRT — turn skirt inside out again and finish the raw edges on the top and around the side seams with a zigzag stitch (I use length 2.5 out of 4 on my machine & 4.5 out of 6 width) or serger
a gathering stitch can also be done by hand & gathering stitches can be removed later
for machine gathering, turn down the tension a bit, use the longest straight stitch available (I use length 4 out of 4 on my machine, 0 width) to do a gathering “basting” stitch on each panel from side seam to side seam (do not backstitch) with the finished edge lined up to the edge of the presser foot
TIP: some fabrics might benefit from doing two rows of gathering stitches – it can make gathering more even and the thread less prone to breaking
pin the side seams and midpoints of the skirt to the side seams and midpoints of the top temporarily just to mark your anchor points
pull just the top thread of the stitch to start gathering the fabric and evenly spreading out the gathers over the panels; you can pull from both ends to make it easier
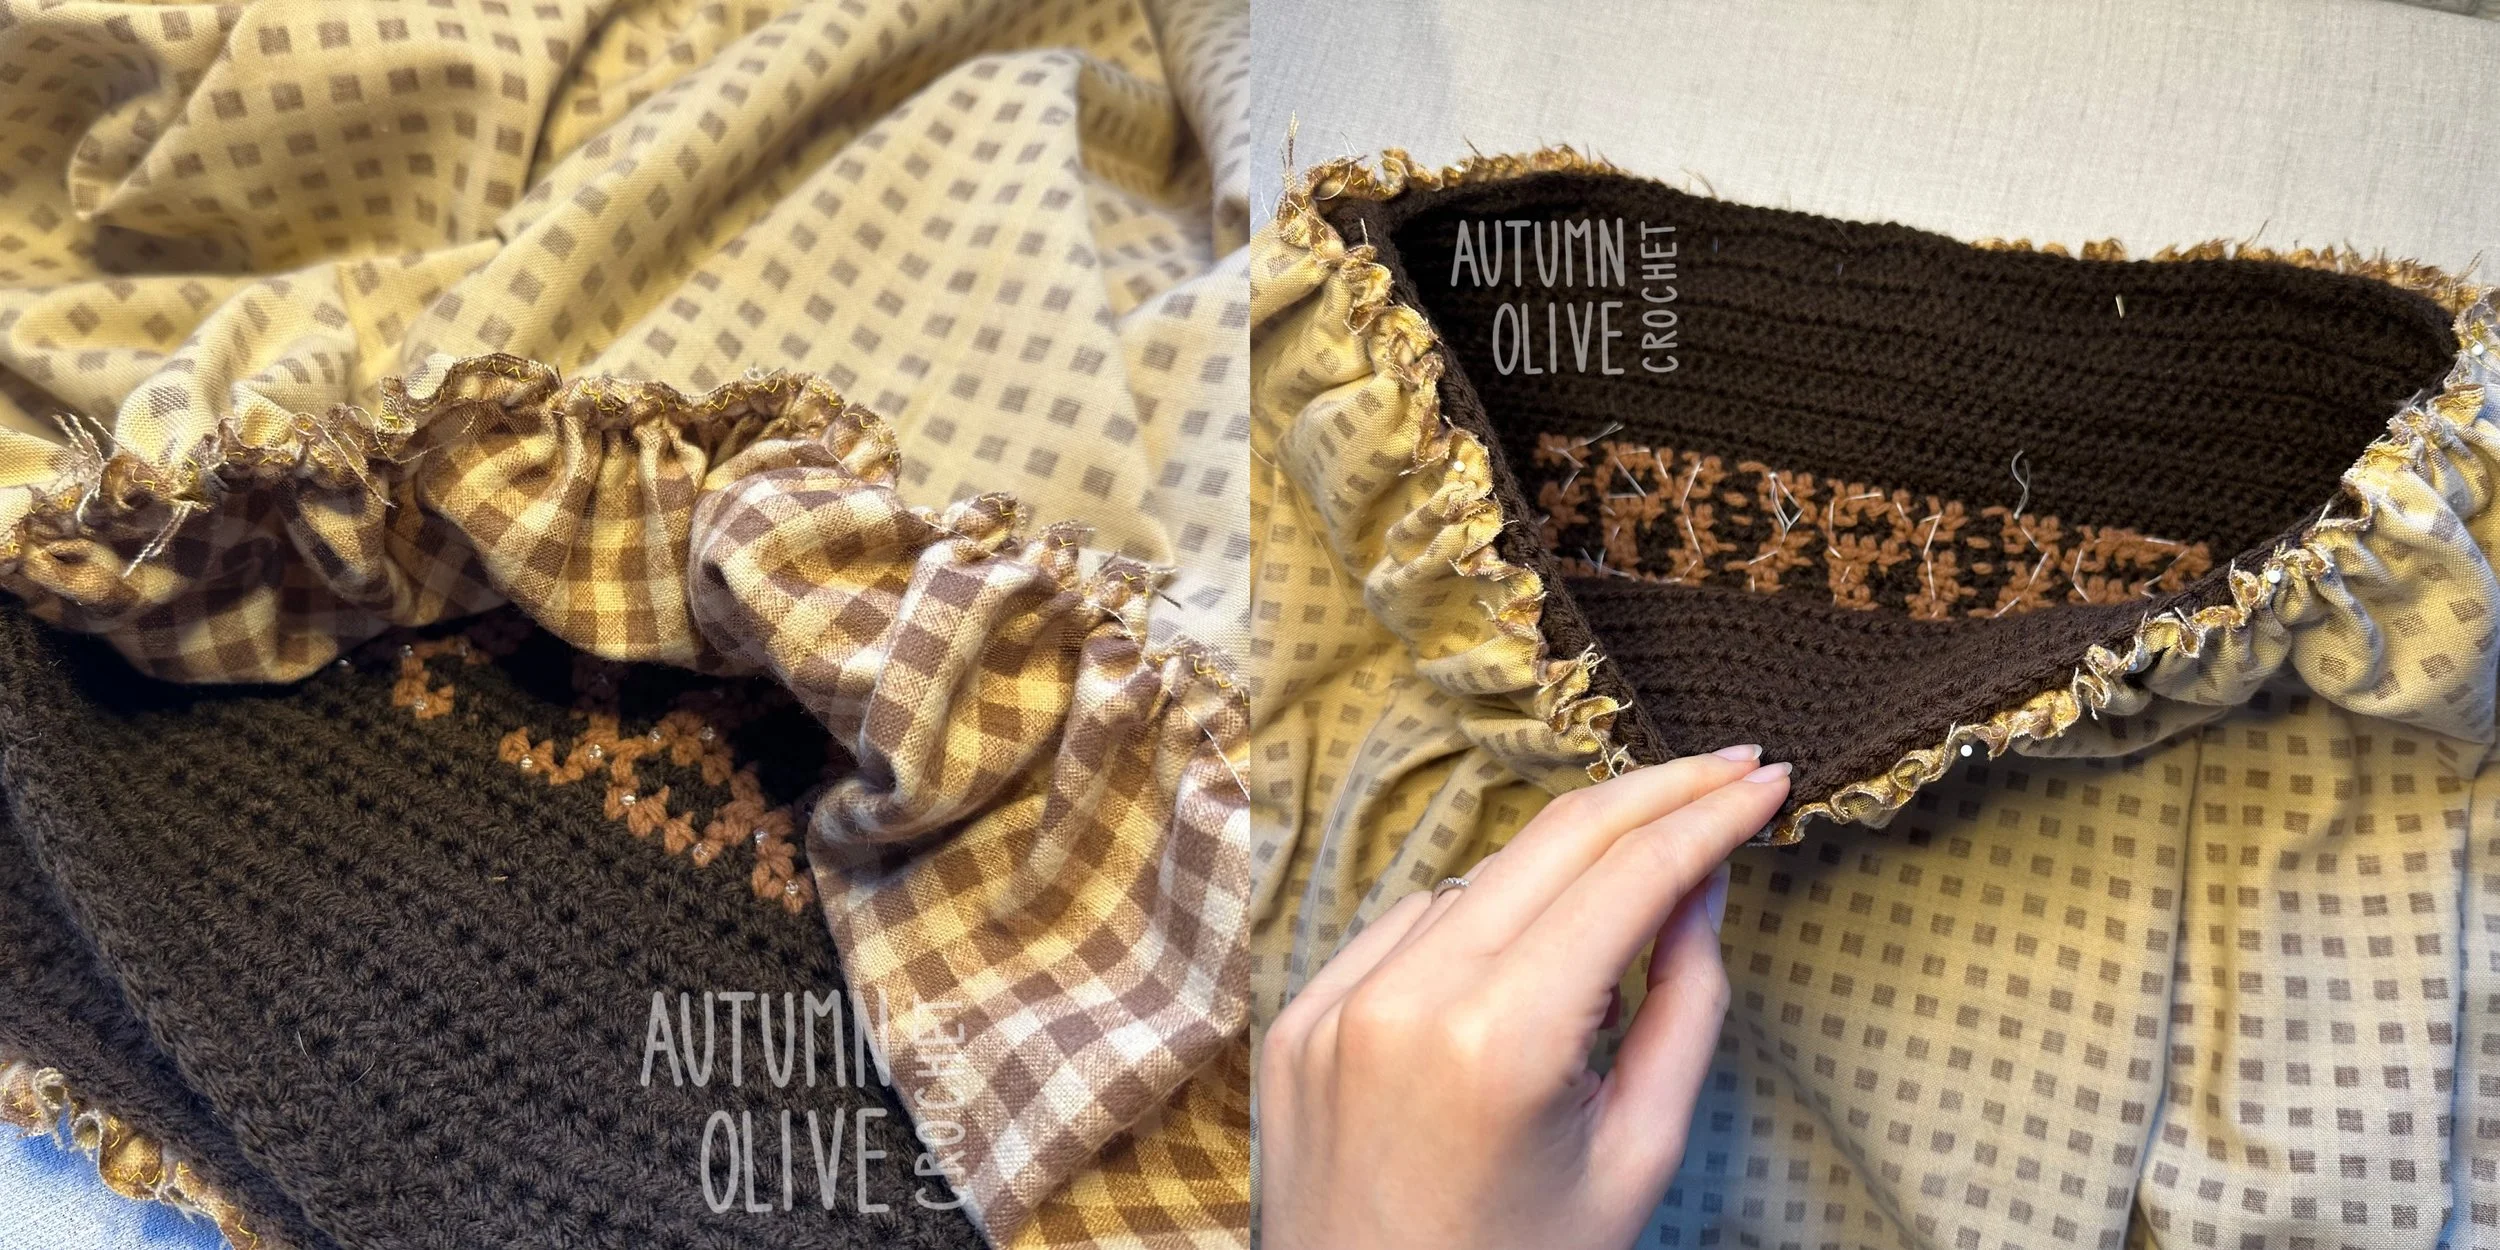
PIN & ATTACH SKIRT — with the skirt inside out, you can just put the top in right side out, so that right side is touching right side
carefully pin all the way around; I pin the basting stitch between rows 1 & 2 of my bodice — you will be sewing with the gathers on top and the crochet part on the bottom, so you want to be able to see the edge of the crochet as you are sewing
use a short & wide zigzag stitch (I use length 2 out of 4 on my machine, 3 out of 6 width) so that the seam has some give to it, all the way around
take your time and make sure:
the gathering/finishing threads are pulled to the outside of the work
the presser foot is down
that you are working on or just past the basting stitch
that the crochet work stays lined up
the fabric is feeding through smoothly
that no parts of the gathers are bunching up on the right side of the work
TIP: if you are using chunky or textured yarn that gets caught on the feed dogs, you can put a piece of parchment paper underneath the panel and sew right through everything
check the right side of your work and make sure no gathers or basting stitches are showing through, give it a gentle stretch and you should feel the gathers loosen; if any basting stitches are stuck you can cut them out with a seam ripper
you can steam down the gathers or iron them if your crochet work is heat safe
PIN, PRESS, & HEM — fold up the bottom towards the inside two times, to your desired hem length, press, pin, then stitch close to the top of the folds; I used a matching top thread color and a mustard colored bobbin thread color as a fun surprise contrast
thank you ♡
tag me in your posts so I can see your creations!!
@autumnolivecrochet
#autumnolivecrochet
#crochetbabydolldress
